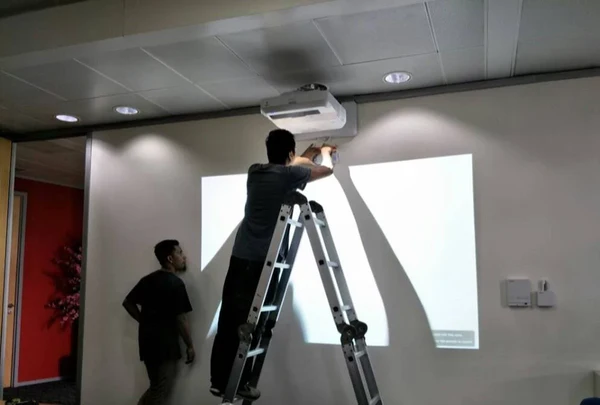
How to install a projector first time
11
Here’s a step-by-step guide for installing a projector for the first time, whether it’s for a home theater, office, or classroom. I’ll keep it practical so you can follow it without guesswork.

1. Choose the Right Location
- Check throw distance (distance from lens to screen) in your projector’s manual — every model is different.
- Ensure the wall or screen is flat, white/light gray, and free from glare.
- The projector should be centered horizontally to the screen.
💡 Tip: If ceiling-mounting, make sure you have power and cable routing planned before drilling.
2. Decide on Mounting Type
- Tabletop / Shelf: Quick setup, portable, no drilling.
- Ceiling Mount: Saves space, gives cleaner look but needs careful alignment.
- Wall Mount (Short-Throw): Ideal for classrooms or small rooms.
3. Gather Tools & Materials
- Projector & remote
- Mounting kit (if ceiling/wall mounting)
- HDMI or VGA cable (and audio cable if needed)
- Power extension cable (if outlet is far)
- Drill, screws, and wall anchors (for mount)
- Measuring tape & spirit level
4. Mount or Position the Projector
For Table/Shelf:
- Place on a stable, level surface.
- Align with center of screen.
- Adjust height with built-in feet.
For Ceiling:
- Mark mounting holes using template from your mount kit.
- Drill holes and install wall anchors (if not into a beam).
- Secure mount plate to ceiling.
- Attach mount bracket to projector.
- Lift and secure projector to mount.
5. Connect the Cables
- Video: HDMI (best quality), VGA (older devices), or USB-C/DisplayPort (modern laptops).
- Audio: Connect to projector speakers or external sound system.
- Power: Use a surge protector to prevent damage.
💡 If ceiling-mounted, route cables through cable raceways or in-ceiling for a clean look.
6. Power On & Adjust Image
- Select correct input source on projector.
- Use the focus ring to sharpen image.
- Adjust zoom to fit screen size.
- Use keystone correction or lens shift to square the image.
7. Optimize the Setup
- Set projector to native resolution for best picture.
- Adjust brightness, contrast, and color to match room lighting.
- In bright rooms, use an ambient light rejecting (ALR) screen for better clarity.
8. Test & Fine-Tune
- Play a video or presentation to check for sharpness and alignment.
- Ensure no cables are loose.
- Tighten all mount screws if ceiling-mounted.
Final Safety Checks
- Ensure ventilation is not blocked (leave at least 2 feet clearance around vents).
- Avoid placing projector near heat sources.
- Turn off and unplug when not in use for long periods.
-
Pingback: Projector installer’s cheat sheet
-
Pingback: How to fix projector installation issues
Related Articles
Make Money Online in 2026 (7+ Legit Ways)
Looking for legitimate ways to make money online? You are in the...
England Struggle in Sydney Test as Steve Smith and Travis Head Score Centuries
England faced a tough challenge in Sydney as Steve Smith and Travis...
New FIFA–Netflix Soccer Video Game to Debut Before 2026 World Cup
FIFA and Netflix are preparing to disrupt the global sports gaming industry...
Saving Money, Stress Less: A Practical Guide to Save More
Saving money is easier than you think when you follow practical tips...


