Tech Innovations
Discover breakthrough tech innovations, emerging technologies, smart solutions, and future-driven ideas shaping the digital world.
How to prevent Over heating in Laptops
How to Prevent Overheating in Laptops — Best Tips to Keep Your Device Cool

Learn how to prevent your laptop from overheating with these practical tips. Improve performance, extend lifespan, and keep your laptop cool perfect for Windows and Mac users.
Laptop overheating is a common issue that affects both performance and hardware longevity. Whether you’re a gamer, student, or professional, maintaining a cool laptop ensures smooth operation and protects vital components from damage. In this blog post, we’ll explore how to prevent laptop overheating with easy-to-follow tips and best practices.
Why Do Laptops Overheat?
Before jumping into the solutions, it’s essential to understand why laptops overheat. Common causes include:
Blocked air vents Dust buildup inside the fans Poor placement (e.g., using on soft surfaces like beds or pillows) Running too many background processes Outdated software or drivers Heavy multitasking or gaming
How to Prevent Overheating in Laptops
1. Use a Hard, Flat Surface
Avoid placing your laptop on soft surfaces like beds or cushions. These block airflow and trap heat. Instead:
Use your laptop on a desk or laptop stand Try cooling pads with built-in fans for extra air circulation
2. Clean the Air Vents and Fans
Dust accumulation is one of the top causes of laptop overheating.
Use compressed air to clean vents regularly Schedule deep internal cleaning once every 6–12 months Avoid using vacuum cleaners which might cause static damage
3. Don’t Block the Laptop Vents
Ensure the airflow is never blocked:
Avoid placing objects near the exhaust vents Elevate the rear of the laptop slightly with a stand or small pads
4. Monitor System Temperature
Install temperature monitoring software to track your laptop’s heat levels:
Tools like HWMonitor, SpeedFan, or Core Temp Mac users can try iStat Menus or Mac Fan Control
Monitoring temperatures helps you act before overheating causes damage.
5. Limit Background Processes
Heavy multitasking or too many startup apps can stress the CPU and GPU:
Use Task Manager (Windows) or Activity Monitor (Mac) to close unused apps Disable unnecessary startup programs Switch to lightweight browsers like Brave or Edge
6. Update Drivers and BIOS
Outdated drivers or firmware can cause inefficient power usage:
Regularly update your graphics drivers, chipset drivers, and BIOS Use official tools from manufacturers like Dell, HP, Lenovo, or ASUS
7. Adjust Power Settings
Optimize your power plan to reduce unnecessary processing:
For Windows: Go to Settings > System > Power & Battery > Power Mode, choose Balanced or Power Saver For Mac: Use System Settings > Battery > Energy Saver
8. Use Integrated GPU When Possible
Switch to the integrated GPU for lighter tasks like browsing and streaming. This reduces heat output compared to the dedicated GPU.
🔗 Also Read: How to Fix Laptop Freezing in Windows 10/11/
9. Avoid Direct Sunlight and Hot Environments
Heat from the environment can drastically affect your laptop’s performance:
Always use your laptop in shaded, ventilated spaces Avoid leaving it in a hot car or under the sun
10. Keep Software and OS Updated
Operating system updates often include efficiency and cooling optimizations:
Install the latest Windows/macOS updates Enable automatic updates to stay protected and optimized
Signs Your Laptop is Overheating
Look out for these warning signs:
Fan running loud constantly System lag or freezing Sudden shutdowns Burnt smell from the vents Laptop feels hot to the touch, especially near the fan exhaust
If you notice these, apply the tips above or seek professional repair.
Keep Your Laptop Cool and Efficient
Preventing laptop overheating isn’t difficult — it just takes regular care and the right usage habits. By cleaning vents, managing background tasks, and using cooling accessories, you can improve your laptop’s performance, extend its lifespan, and avoid costly repairs.
Frequently Asked Questions (FAQs)
Q1: Is it safe to use a laptop while it’s charging?
A: Yes, but ensure it’s on a hard surface and well-ventilated to avoid overheating.
Q2: Can overheating damage a laptop permanently?
A: Yes, prolonged overheating can damage internal components like the motherboard, GPU, or battery.
Q3: How often should I clean my laptop vents?
A: Every 1–3 months, or more often if you use it in dusty environments.
How to Fix Laptop Freezing in Windows 10/11
How to Fix Laptop Freezing in Windows 10/11: A Complete Step-by-Step Guide
Is your Windows 10 or Windows 11 laptop constantly freezing, lagging, or becoming unresponsive? You’re not alone. Laptop freezing is a common issue faced by many users, often caused by software glitches, outdated drivers, or hardware limitations. In this guide, we’ll show you how to fix a laptop that keeps freezing on Windows 10/11 with effective step-by-step solutions.

Quick Tip: Regular system maintenance and keeping your software up-to-date can significantly reduce freezing issues.
Common Reasons Why Your Laptop Freezes
Before diving into the solutions, let’s explore the typical causes of freezing on Windows laptops:
Too many background processes Low disk space or memory (RAM) Corrupt system files Outdated or incompatible drivers Malware or virus infection Faulty hardware (like hard drives or RAM)
How to Fix Laptop Freezing in Windows 10/11
1. Restart Your Laptop
Sometimes, a simple reboot is enough to clear temporary glitches and memory overload.
Steps:
Press Ctrl + Alt + Delete Select the Power icon → Click Restart
2. Run a Full System Scan for Malware
Viruses and malware can hog system resources, leading to freezing.
Steps:
Open Windows Security Click Virus & threat protection Click Quick scan or Full scan
3. Disable Startup Programs
Too many apps running at startup can slow down your system.
Steps:
Press Ctrl + Shift + Esc to open Task Manager Go to Startup tab Disable unnecessary programs
4. Update Windows and Drivers
Outdated drivers and system software can cause compatibility issues and freezing.
Steps:
Go to Settings → Update & Security → Windows Update Click Check for updates
Also, update drivers:
Right-click Start → Device Manager Right-click on a device (e.g., Display Adapters) → Update driver
5. Free Up Disk Space
A full hard drive can drastically slow your laptop and cause it to freeze.
Steps:
Open Settings → System → Storage Use Storage Sense to delete temporary files and unused apps
You can also use Disk Cleanup:
Type Disk Cleanup in the Start menu Select drive and delete unnecessary files
6. Run System File Checker (SFC)
Corrupted system files may be the root cause of the freezing.
Steps:
Search Command Prompt, right-click and select Run as administrator Type: sfc /scannow → Press Enter Let Windows repair any damaged system files
7. Check RAM and Hardware Health
Faulty RAM or HDD/SSD can also cause freezing.
Steps:
Type mdsched.exe in Start → Run Windows Memory Diagnostic Restart and let it scan your memory For hard drives, use: chkdsk /f /r command in Command Prompt (admin)
8. Perform a Clean Boot
A clean boot helps you diagnose if background services are causing the issue.
Steps:
Press Windows + R, type msconfig Under Services, check Hide all Microsoft services, then click Disable all Go to Startup tab → Open Task Manager → Disable all startup items Restart your PC
9. Reset Windows (if all else fails)
If the issue persists, resetting Windows can help restore stability.
Steps:
Go to Settings → Update & Security → Recovery Click Reset this PC → Choose Keep my files or Remove everything
Backup important data before resetting!
✅Bonus Tips to Prevent Freezing in Future
Use an SSD instead of HDD for better performance Keep fewer browser tabs open Don’t overload your laptop with unnecessary software Keep drivers and system up-to-date regularly Clean dust from vents to prevent overheating
Fixing a laptop that freezes in Windows 10/11 may require trying several solutions. Start with basic fixes like updating drivers and cleaning up startup apps, and escalate to advanced tools like SFC or a full reset if necessary. By keeping your laptop optimized, you’ll enjoy a smoother, more productive experience.
How to Clean Up a Slow Laptop (Windows 10/11)
Is your Windows 10 or 11 laptop running frustratingly slow? Don’t worry you’re not alone. Over time, even the best laptops begin to lag due to cluttered storage, outdated software, background programs, or malware. Fortunately, there are effective ways to clean up your laptop and boost its speed without spending money on upgrades.
In this guide, we’ll walk you through step-by-step solutions to clean up and speed up a slow laptop running Windows 10 or 11.
Why Is Your Laptop Slow?
Before we jump into the fixes, it’s helpful to understand some common causes:
Too many startup programs Full hard drive or cluttered storage Outdated system or drivers Malware or unnecessary background apps Fragmented or corrupted system files
Step-by-Step Guide to Speed Up Your Laptop
1. Uninstall Unnecessary Programs
Over time, we install apps we rarely use. These can consume storage and background resources.
Steps:
Go to Settings > Apps > Installed apps Sort by size or installation date Uninstall any software you no longer use
How to fix a computer display problem
2. Disable Startup Programs
Too many startup apps can drastically slow down boot times.
Steps:
Press Ctrl + Shift + Esc to open Task Manager Click the Startup tab Right-click and disable unneeded apps
3. Use Storage Sense to Free Up Space
Windows 10/11 has a built-in tool to automatically clean temporary files.
Steps:
Go to Settings > System > Storage Turn on Storage Sense Click Temporary Files and delete items like cache and recycle bin contents
4. Run a Malware Scan
Malware or bloatware can slow down your PC dramatically.
Steps:
Use Windows Security: Go to Settings > Privacy & security > Windows Security > Virus & threat protection Run a full scan Or install a trusted third-party antivirus (like Bitdefender or Malwarebytes)
5. Update Windows and Drivers
Outdated drivers and system files may be causing lag.
Steps:
Go to Settings > Windows Update Install any pending updates Use Device Manager to update individual drivers if necessary
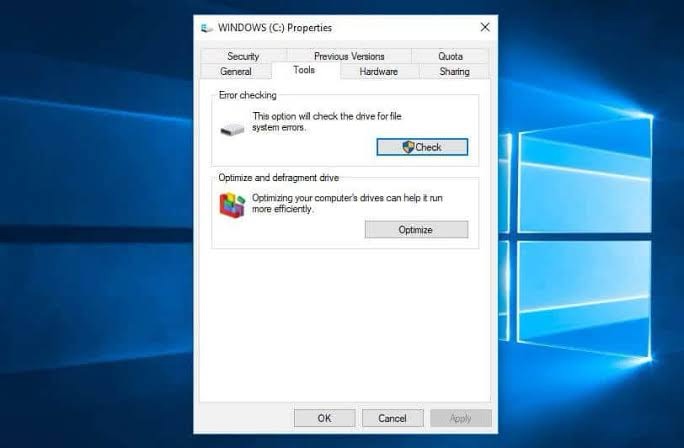
6. Defragment and Optimize Drives (HDD only)
This applies to laptops with traditional hard drives (not SSDs).
Steps:
Search for “Defragment and Optimize Drives” Select your hard drive Click Optimize
7. Adjust Performance Settings
You can improve performance by tweaking Windows’ visual effects.
Steps:
Search “Performance” in Start and select Adjust the appearance and performance of Windows Select Adjust for best performance or customize settings manually
8. Reset Your PC (Optional)
If all else fails, you can reset your laptop to factory settings.
Steps:
Go to Settings > System > Recovery Click Reset this PC Choose to keep your files or remove everything
Must Read:
Bonus Tips for Long-Term Speed
Keep your desktop clean Avoid using multiple antivirus programs at once Restart your PC regularly Use cloud storage to reduce local file clutter Invest in a RAM upgrade or switch to SSD if possible
Cleaning up a slow laptop doesn’t have to be complicated or expensive. With just a few maintenance steps, you can dramatically improve your Windows 10 or 11 laptop’s speed and performance. Follow this guide regularly, and your device will stay fast and efficient for years to come.
Best Antivirus Tools for Windows and Mac in 2025: Top picks for Ultimate Protection

Cyber threats in 2025 are more advanced than ever. Whether you’re using Windows or macOS, having a reliable antivirus solution is no longer optional—it’s essential. From ransomware and phishing attacks to zero-day threats, your system needs real-time, intelligent protection.
In this SEO-optimized blog post, we’ll explore the best antivirus tools for Windows and Mac in 2025, including free and premium software, key features, and why each option stands out in the crowded cybersecurity market.
Why Antivirus Software Still Matters in 2025
Although modern operating systems include built-in protection (like Windows Security and XProtect on Mac), they aren’t always enough. Antivirus software provides:
Real-time protection from malware, ransomware, and spyware Firewall control and secure browsing features Phishing protection for email and websites Performance optimization and system cleanup tools Cross-platform compatibility for multiple devices
Top Antivirus Tools for Windows and Mac in 2025
1. Bitdefender Total Security 2025
Best Overall Protection for Windows & Mac
✅ Advanced threat defense with AI-driven detection ✅ Multi-layer ransomware protection ✅ Built-in VPN (200MB/day) ✅ Anti-tracker and parental controls
Pricing: From $49.99/year for 5 devices
Free Version: Yes (with limited features)
Why We Recommend It: Bitdefender offers consistent top-tier protection scores, low system impact, and features tailored for both Windows and Mac users.
✅ SEO Tip: This is one of the most searched tools in “best antivirus 2025” keywords.
2. Norton 360 Deluxe
Best for Online Privacy and Cloud Backup
✅ Real-time threat protection + smart firewall ✅ Secure VPN and dark web monitoring ✅ 50GB cloud backup (Windows only) ✅ Password manager
Pricing: From $59.99/year for 5 devices
Free Version: No, but free trial available
Why We Recommend It: Norton 360 combines excellent malware protection with privacy features like a no-log VPN and identity theft monitoring, ideal for families and remote workers.
3. Intego Mac Premium Bundle X9
Best Antivirus for Mac in 2025
✅ Designed exclusively for macOS ✅ Real-time malware scanning and firewall ✅ Mac backup + parental controls ✅ Optimizes Mac performance
Pricing: Starts at $39.99/year
Free Version: No (trial available)
Why We Recommend It: Unlike many cross-platform antivirus tools, Intego is built specifically for Mac users, offering macOS-native performance and strong malware protection.
4. Kaspersky Premium
Best for Advanced Users and Customization
✅ Excellent malware detection ✅ Two-way firewall, VPN, and webcam protection ✅ Encrypted browsing and payment protection ✅ Cloud dashboard for managing multiple devices
Pricing: From $74.99/year for 5 devices
Free Version: Yes (Kaspersky Free Antivirus)
Why We Recommend It: Kaspersky consistently ranks high in independent AV tests and offers a rich suite of tools without overwhelming new users.
5. Avast One
Best Free Antivirus with Premium Upgrades
✅ Free real-time antivirus + firewall ✅ Data breach monitoring ✅ Secure browser and VPN (limited in free tier) ✅ Available for Windows, Mac, Android, and iOS
Pricing: Free version available; Premium starts at $50/year
Free Version: Yes
Why We Recommend It: Avast One provides robust protection in the free version and is great for casual users who don’t need premium tools right away.
6. Malwarebytes Premium
Best for Lightweight, On-Demand Protection
✅ Fast scanning with low system resource use ✅ Great secondary antivirus tool ✅ Blocks malware, PUPs, and ransomware ✅ Available for Windows and Mac
Pricing: From $59.99/year
Free Version: Yes (manual scanning only)
Why We Recommend It: Malwarebytes excels as both a standalone or complementary antivirus. It’s perfect for users who want strong protection with minimal interference.
7. McAfee Total Protection
Best for Multi-Device Households
✅ Protects up to 10 devices ✅ VPN, identity monitoring, and file encryption ✅ Web advisor and anti-phishing tools ✅ Performance optimization features
Pricing: From $49.99/year
Free Version: No (30-day free trial)
Why We Recommend It: McAfee is a trusted name with feature-rich packages ideal for protecting multiple platforms Windows, Mac, Android, and iOS.
Tips for Choosing the Right Antivirus in 2025
For light users: Avast One or Malwarebytes Free For gamers: Bitdefender (minimal performance impact) For business use: Norton 360 or Kaspersky Premium For Mac users: Intego or Malwarebytes For family protection: McAfee or Norton 360
✅ SEO Tip: Include long-tail keywords like “best antivirus for Windows 11 in 2025” and “top Mac antivirus software 2025” throughout your content for better search visibility.
Related Blog Posts
How to Remove Malware from Your Computer (Step-by-Step) How to Speed Up a Slow Computer in 2025 How to Secure Your Wi-Fi Network at Home
Stay Secure in 2025 and Beyond
Choosing the best antivirus software for your Windows or Mac computer in 2025 doesn’t have to be complicated. Whether you’re after premium features or a free basic tool, the options listed above offer the security, performance, and peace of mind you need in today’s cyber landscape.
How to fix a computer that keeps restarting
How to Fix a Computer That Keeps Restarting: Step-by-Step Guide (Windows & Mac)

Is your computer restarting randomly or stuck in a reboot loop? Learn how to fix a computer that keeps restarting with this detailed troubleshooting guide for Windows and macOS.
How to Fix a Computer That Keeps Restarting (Complete Troubleshooting Guide)
A computer that constantly restarts can be incredibly frustrating especially when you’re in the middle of important work. Whether you’re using Windows or macOS, random restarts are often signs of deeper hardware, software, or system errors.
In this SEO-optimized blog post, you’ll learn how to fix a computer that keeps restarting, with easy-to-follow steps, common causes, and effective solutions to restore stability to your system.
Why Your Computer Keeps Restarting: Common Causes
Understanding the root of the issue is key to solving it. Here are the top reasons why your computer may be restarting on its own:
Faulty hardware or overheating 💾 Corrupt system files or software conflicts 🦠 Virus or malware infection ⚙️ Driver or BIOS issues 🔌 Faulty power supply or battery ⚡ System update problems or auto-restart settings
How to Fix a Computer That Keeps Restarting (Step-by-Step)
Step 1: Disable Automatic Restart (Windows Only)
This helps you see error messages instead of the system rebooting instantly.
Press Windows + R, type sysdm.cpl, and press Enter. Go to the Advanced tab. Under Startup and Recovery, click Settings. Uncheck Automatically restart under System failure. Click OK and restart your computer.
This allows you to identify issues like the Blue Screen of Death (BSOD).
Step 2: Check for Overheating
Overheating is one of the most common causes of auto-restart loops.
What to Do:
Ensure air vents are clean and not blocked Use a cooling pad for laptops Check internal fans for dust buildup Install temperature monitoring tools: Windows: HWMonitor or Core Temp Mac: iStat Menus or Macs Fan Control
Also see: How to Prevent Overheating in Laptops
Step 3: Run a Full Virus and Malware Scan
Viruses can force your computer to restart as a way to avoid detection or cause harm.
Recommended Tools:
Windows Defender (built-in) Malwarebytes Bitdefender
Run a full system scan and remove any threats detected.
Step 4: Update or Roll Back Drivers
A newly installed driver may be incompatible, causing random restarts.
On Windows:
Right-click Start > Device Manager Expand Display adapters, Network adapters, etc. Right-click each device and choose: Update driver Or Properties > Driver > Roll back driver if the issue started after an update
On macOS:
Updates are tied to macOS updates. Go to System Settings > Software Update
Step 5: Check the Power Supply (PSU or Battery)
A faulty PSU or battery can restart your PC without warning.
For desktops: Ensure your power supply unit (PSU) is providing stable power. Consider testing with a replacement. For laptops: Try removing the battery (if possible) and running directly on AC power.
Also check:
Loose or damaged power cables UPS or surge protector issues
Step 6: Perform a System File Check (Windows)
Corrupt system files can trigger reboots.
Steps:
Open Command Prompt as administrator Type: sfc /scannow Press Enter and wait for the scan to complete
This tool will repair or replace any corrupted system files.
Step 7: Boot into Safe Mode
Safe Mode loads minimal drivers and can help isolate the cause.
On Windows:
Press Shift + Restart > Troubleshoot > Advanced options > Startup Settings > Enable Safe Mode
On Mac:
Restart and hold Shift as the system boots
If your computer doesn’t restart in Safe Mode, a third-party app or driver may be the problem.
Step 8: Uninstall Recently Installed Programs or Updates
If the issue began after installing software or updates, remove them.
On Windows:
Settings > Apps > Installed apps Sort by Recently Installed and uninstall suspicious apps For updates: Settings > Windows Update > Update History > Uninstall updates
On macOS:
Use Launchpad or Applications folder to uninstall recently added apps
Step 9: Reset or Restore Your System
If all else fails, restore your system to a time before the issue began.
Windows:
System Restore: Control Panel > Recovery > Open System Restore Reset this PC: Settings > System > Recovery > Reset this PC
Mac:
Restart in macOS Recovery (Command + R) > Use Time Machine backup or Reinstall macOS
Bonus Tip: Check Event Logs (Advanced)
View system logs to find crash causes.
On Windows:
Press Windows + X > Event Viewer Check System logs for warnings and errors near the crash time
On macOS:
Use Console app to check system logs
Keep Your Computer Stable
If your computer keeps restarting, don’t ignore it—it could lead to data loss or hardware damage. Use this guide to troubleshoot the issue, and if needed, consult a professional technician.
Still stuck in a reboot loop? Share your system model and symptoms in the comments, and we’ll help you troubleshoot further!
How to prevent your computer from crashing
How to Prevent Your Computer from Crashing: 10 Proven Tips to Keep Your PC Stable
Tired of random system crashes? Learn how to prevent your computer from crashing with these expert tips. Optimize performance and avoid data loss on Windows or Mac.

How to Prevent Your Computer from Crashing: A Step-by-Step Blog Guide
Computer crashes can be frustrating, disruptive, and sometimes damaging to your files and hardware. Whether you’re using Windows or macOS, random freezes, blue screens, and restarts are usually avoidable with the right preventive measures.
In this SEO-optimized blog post, you’ll discover how to prevent your computer from crashing, including actionable steps, maintenance tips, and system checks that can keep your PC or Mac running smoothly and reliably.
Why Do Computers Crash?
Before learning how to stop your computer from crashing, it’s important to understand why it happens. Common causes include:
Overheating Corrupt or outdated drivers Malware infections Faulty hardware Software conflicts Low RAM or storage
Now let’s look at how you can stop these issues before they crash your system.
1. Keep Your System Updated
Operating system and driver updates include important bug fixes and security patches.
For Windows:
Go to Settings > Windows Update > Check for Updates Update all device drivers via Device Manager
For macOS:
Go to System Settings > General > Software Update Install all pending updates for macOS and apps
SEO Tip: Mentioning “how to update Windows drivers” or “macOS update issues” in related posts boosts keyword visibility.
2. Clean Up Your Hard Drive Regularly
Low disk space can cause system instability and slowdowns.
See Also: How to Clean Up a Slow Laptop (Windows 10/11)
What to Do:
Use Disk Cleanup (Windows) or Storage Management (Mac) to remove junk files Delete unused apps and duplicate files Transfer large files to external drives or cloud storage
3. Scan for Malware and Viruses
Malicious software can cause crashes, slowdowns, and unexpected restarts.
Recommended Tools:
Windows Defender (built-in) Malwarebytes or Bitdefender for added protection
Run full scans weekly and update your antivirus software regularly.
4. Prevent Overheating
Excessive heat can cause sudden shutdowns or hardware damage.
Tips:
Keep vents and fans clean using compressed air Don’t place laptops on soft surfaces (like beds or cushions) Use a cooling pad or external fan for laptops Monitor temperature with apps like HWMonitor (Windows) or Mac Fan Control
SEO Tip: Use long-tail keywords like “how to keep my laptop cool” for better organic search ranking.
5. Upgrade RAM and Storage If Needed
Running out of RAM or using a failing hard drive can lead to performance issues and crashes.
Signs You Need an Upgrade:
System frequently freezes under load Programs crash or fail to open Storage drive is consistently over 90% full
Upgrade to SSD for faster performance and more reliability.
6. Check for Hardware Failures
Failing RAM, graphics cards, or hard drives can cause recurring crashes.
How to Check:
Run Memory Diagnostics (Windows): Search “Windows Memory Diagnostic” Check Disk Health: Use chkdsk (Windows) or Disk Utility > First Aid (Mac)
Consider replacing hardware if errors are detected.
7. Disable Problematic Startup Programs
Too many apps launching at startup can slow down or crash your computer.
For Windows:
Open Task Manager > Startup tab Disable unnecessary programs
For Mac:
Go to System Settings > General > Login Items Remove apps you don’t need at startup
8. Avoid Overloading the System
Running multiple high-memory applications at once can crash systems with limited RAM.
Best Practices:
Don’t run too many tabs or apps simultaneously Use lighter versions of software (e.g., browser extensions instead of full apps) Close background apps when gaming or editing videos
9. Perform Regular System Maintenance
Routine maintenance prevents long-term problems.
Recommended Schedule:
Weekly virus scan Monthly disk cleanup Quarterly driver update Annual thermal paste reapplication (advanced users)
10. Backup Your Data and Create Restore Points
Even with prevention, crashes can still happen. Be prepared.
Windows:
Use System Restore and File History Set automatic restore points after major updates
Mac:
Use Time Machine to create regular backups
Keep Your Computer Crash-Free
Preventing your computer from crashing isn’t complicated it just requires regular care. By staying updated, cleaning your system, managing software, and protecting against malware, you can avoid crashes and extend the life of your machine.
Got questions or crash issues that won’t go away? Drop them in the comments below or check out our troubleshooting section.
Related Posts for Better PC Health
How to Fix a Computer That Keeps Restarting How to Clean Up Your Mac for Faster Performance Best Antivirus Software for 2025: Free & Paid
How to fix a computer display problem
How to Fix a Computer Display Problem: Step-by-Step Guide (Windows & Mac).
Is your computer screen blank, flickering, or showing errors? Learn how to fix common display problems on Windows and Mac with this detailed, SEO-optimized guide.

A Complete Step-by-Step Guide
Whether your computer screen goes black, shows distorted images, or flashes unexpectedly, display problems can be frustrating. Fortunately, most display issues can be resolved with a few simple checks and adjustments.
In this step-by-step blog post, we’ll guide you through how to fix common computer display problems on both Windows and macOS systems. Perfect for beginners, this guide is SEO-optimized and includes internal links to enhance your troubleshooting journey.
Common Computer Display Problems
Before diving into solutions, let’s identify the most common display issues users experience:
Blank or black screen Flickering or flashing screen Screen resolution errors Color distortion External monitor not working “No signal” error on monitor
Step-by-Step Guide to Fix Computer Display Problems
Step 1: Check Physical Connections
Why it matters: Loose or damaged cables are one of the most common causes of display issues.
What to Do:
Turn off your computer and monitor. Unplug the video cable (HDMI, VGA, DVI, or DisplayPort) and reconnect it securely. Check for visible damage to the cable or ports. If using a desktop, make sure the graphics card is firmly seated inside the case. Test with another monitor or cable if available.
If your issue is with a second monitor, check out our guide on: How to Set Up Dual Monitors on Windows and Mac.
💡 Step 2: Adjust Brightness and Power Settings
For Laptops:
Try adjusting the brightness keys (usually F1–F12 with a sun icon). Plug in the power cable—some laptops reduce brightness when on battery mode.
For Desktops:
Use the monitor’s physical buttons to increase brightness or contrast.
Step 3: Boot into Safe Mode
Purpose: Safe Mode loads only essential drivers and can help identify software or driver issues.
For Windows:
Restart the PC and press F8 or hold Shift + Restart from the login screen. Select Troubleshoot > Advanced options > Startup Settings. Choose Enable Safe Mode.
For macOS:
Shut down the Mac. Turn it on and immediately press Shift until the Apple logo appears.
If the display works fine in Safe Mode, the issue may be caused by a recent driver or software update.
Step 4: Update or Roll Back Display Drivers
For Windows:
Press Windows + X and select Device Manager. Expand Display Adapters. Right-click your GPU (e.g., Intel, NVIDIA, AMD) and choose: Update Driver to install new updates OR Properties > Driver > Roll Back Driver if the issue began recently
For macOS:
macOS updates include graphics driver updates. Go to System Settings > General > Software Update.
Step 5: Change Screen Resolution and Refresh Rate
For Windows:
Right-click the desktop and select Display Settings. Scroll down and click Advanced display settings. Change the resolution or refresh rate to a lower option to test stability.
For macOS:
Go to System Settings > Displays. Click Display Settings, then choose Scaled and test different resolutions.
Step 6: Test with an External Monitor
Why? This helps determine if the problem lies with your screen or graphics hardware.
Connect an external monitor or TV to your computer. Press Windows + P (Windows) or go to Apple > Display Settings (Mac) to mirror or extend the display. If the external monitor works, your internal display might be faulty.
SEO Tip: Learn How to Mirror iPhone to Mac or How to Fix a Laptop Screen That Won’t Turn On for more display-related solutions.
Step 7: Perform a System Restore or Reset
If the issue started after a software update or installation:
Windows:
Go to Settings > System > Recovery. Choose Reset this PC or Open System Restore.
macOS:
Restart in macOS Recovery Mode (Command + R). Choose Restore from Time Machine or Reinstall macOS.
Bonus Troubleshooting Tips
Run Display Troubleshooter (Windows): Settings > System > Troubleshoot > Other troubleshooters > Display Disable Hardware Acceleration in apps (especially browsers) Go to app settings > disable “Use hardware acceleration” Check for Malware: Some display glitches can be caused by viruses or malware. Run a scan using Windows Defender or a trusted antivirus.
When to Seek Professional Help
If none of the above steps resolve your issue, it could be:
A failing GPU or motherboard A broken screen or inverter (especially in laptops) Overheating or power supply issues
Consider taking your device to a certified technician for hardware diagnostics.
Related Internal Resources
How to Speed Up a Slow Laptop (Windows 10/11) Best Antivirus Tools for PC and Mac How to Fix Laptop Not Charging Issue
How to create astonishing presentation using AI tools
How to Create an Astonishing Presentation with AI (Step-by-Step)

Step 1: Define Your Goal
Clearly understand the objective of your presentation. Ask:
Who is your audience? What do you want them to do or learn? What tone should you use?
Step 2: Choose the Right AI Tool
Select a tool based on your needs:
For storytelling: Tome For team projects: Beautiful.ai For marketing visuals: Canva For sleek design: Gamma
Step 3: Input Your Topic or Prompt
Most tools will ask you to:
Enter a title or topic Add a short description or bullet points Choose a style/theme
Example Prompt for Tome:
“Create a 10-slide pitch deck for a sustainable fashion startup.”
Step 4: Customize the Design and Content
AI gives you a draft your job is to:
Refine the messaging Add custom branding and visuals Embed charts, videos, or links if needed
Step 5: Export and Share
You can:
Download as PDF or PowerPoint Share a live link (Gamma, Tome) Embed into your website or blog
SEO Optimization Tips for AI-Generated Presentations
If you’re embedding or publishing your AI presentation online, consider these strategies:
1. Use SEO-Friendly Titles
Example:
“Q3 Business Overview”
“Q3 Business Performance Overview – Sales, Marketing & Revenue Trends”
2. Add Metadata and Alt Text
Tools like Canva and Beautiful.ai allow you to add:
Alt text to images Meta descriptions for slides
3. Write Supporting Blog Content
Embed your presentation within a well-written blog post (like this one). Include:
A keyword-rich intro Summary of the slides CTAs (call to action)
4. Optimize for Mobile
Choose AI tools that generate mobile-friendly decks (e.g., Gamma, Tome).
5. Internal Linking
Mention or link to related blog posts to increase SEO authority. For example:
Also Read: How to Use AI for Graphic Design Learn more about Top Free AI Content Tools
AI tools for presentations are not just a shortcut—they’re a powerful advantage. Whether you’re a student, entrepreneur, or marketer, these platforms help you create eye-catching, impactful presentations in minutes.
Don’t just inform—captivate.
Internal Link Suggestions:
How to Create a Winning Business Pitch with AI Tools Top 10 Free AI Tools for Content Creators How to Embed Presentations on Your WordPress Blog
How to set up and use Apple Cash on your iPhone
How to Set Up and Use Apple Cash on Your iPhone (2025 Guide)

Want to send money to friends, split bills, or receive payments right from your iPhone? With Apple Cash, you can easily send, receive, and spend money directly in the Wallet or Messages app no extra app needed.
In this step-by-step guide, you’ll learn exactly how to set up and use Apple Cash on your iPhone, manage your balance, and even use it in stores or online.
What Is Apple Cash?
Apple Cash is a digital debit card built into your iPhone’s Wallet app. It allows you to:
- Send and receive money via Messages or Wallet
- Use funds to pay with Apple Pay
- Transfer money to your bank account
- Automatically receive Daily Cash from your Apple Card (if applicable)
Think of it as a virtual cash card that works anywhere Apple Pay is accepted.
How to Set Up Apple Cash on iPhone
To use Apple Cash, you must:
- Be at least 18 years old (or part of Apple Cash Family for teens)
- Live in the U.S.
- Have an eligible iPhone with iOS 15.5 or later
- Enable two-factor authentication for your Apple ID
Step-by-step:
- Open the Wallet app on your iPhone
- Tap Apple Cash card (or tap + to add)
- Tap Set Up Apple Cash
- Follow the on-screen instructions to verify your identity
- Accept the Terms & Conditions
🔐 You may be asked to verify your identity with your Social Security number and other personal information.
How to Send Money with Apple Cash
- Open the Messages app
- Open a conversation with the person you want to pay
- Tap the Apple Pay button (under the iMessage box)
- Enter the amount
- Tap Pay, then Send
- Use Face ID or Touch ID to confirm
✅ The recipient must also have Apple Cash enabled to receive funds.
How to Receive Money with Apple Cash
When someone sends you money via iMessage:
- You’ll get a notification
- The money is instantly added to your Apple Cash balance
- You can use it for purchases or transfer it to your bank
How to Transfer Apple Cash to Your Bank
- Open the Wallet app > Tap your Apple Cash card
- Tap More (•••) > Then tap Transfer to Bank
- Enter the amount
- Choose:
- Instant Transfer (for a small fee)
- 1–3 Business Days (free)
- Confirm using Face ID or Touch ID
💳 Instant transfers require a Visa debit card linked to Apple Pay.
Where Can You Use Apple Cash?
- In stores and online wherever Apple Pay is accepted
- In apps and Safari checkouts
- To send money to friends
- To pay your Apple Card balance or subscriptions
Apple Cash Family: For Kids & Teens
Want to set up Apple Cash for your child?
- Go to Settings > [Your Name] > Family Sharing
- Tap Apple Cash
- Select your child > Tap Set Up Apple Cash
- Complete the setup with parental controls
🧠 Parents can view activity and set limits for spending or transfers.
Is Apple Cash Safe?
Yes Apple Cash is FDIC-insured and protected with Face ID, Touch ID, and two-factor authentication. Apple partners with Green Dot Bank to manage and secure the service.
Setting up and using Apple Cash on your iPhone is fast, secure, and convenient. Whether you’re splitting dinner, shopping online, or managing family funds, Apple Cash makes everyday transactions smoother right from your Wallet or Messages app.
How to upgrade and manage your iCloud storage on iPhone
How to Upgrade and Manage Your iCloud Storage on iPhone (2025 Guide)

Running out of space on iCloud? Can’t back up your photos or data? You’re not alone. Many iPhone users eventually face the dreaded “iCloud Storage Full” warning. In this step-by-step guide, we’ll show you exactly how to upgrade and manage your iCloud storage on iPhone, so you never lose important files or miss a backup again.
What Is iCloud Storage?
iCloud is Apple’s cloud-based storage service that automatically saves your data—including photos, messages, contacts, app data, backups, and more—so you can access it from any Apple device.
By default, Apple gives you 5GB of free storage, which fills up fast. That’s why managing and upgrading your iCloud plan is essential for most users.
How to Check Your iCloud Storage Usage
- Open the Settings app on your iPhone
- Tap your name at the top (Apple ID)
- Tap iCloud
- You’ll see a bar chart showing used and available storage
- Tap Manage Account Storage to view detailed usage by app or feature
💡 This helps you understand what’s taking up space—whether it’s photos, messages, or backups.
How to Upgrade Your iCloud Storage Plan
To get more space, follow these simple steps:
- Go to Settings > [Your Name] > iCloud
- Tap Manage Account Storage or iCloud+
- Tap Upgrade to iCloud+
- Choose a plan:
- 50GB – Great for light users ($0.99/month)
- 200GB – Ideal for families or heavy users ($2.99/month)
- 2TB – Best for pros, creators, or shared family storage ($9.99/month)
- Confirm with Face ID, Touch ID, or password
✅ Your upgrade applies instantly, and billing goes through your Apple ID payment method.
How to Manage Your iCloud Storage and Free Up Space
Even with a bigger plan, smart management helps you stay organized and save money.
1. Delete Old Backups
- Go to Settings > iCloud > Manage Account Storage > Backups
- Select a device
- Tap Delete Backup for old or unused devices
2. Optimize Photos
- Go to Settings > Photos
- Enable iCloud Photos
- Select Optimize iPhone Storage to save device space while full-resolution images stay in the cloud
3. Clear iCloud Drive Files
- Open the Files app > Tap Browse > iCloud Drive
- Delete files or move them to local storage or another service
4. Manage Messages
- Go to Settings > Messages > Keep Messages
- Change from “Forever” to 30 Days or 1 Year
- Delete large attachments in message threads
5. Disable Apps You Don’t Need to Sync
- Go to Settings > [Your Name] > iCloud
- Turn off apps that don’t need cloud sync (like Notes or Mail for unused accounts)
Bonus Tip: Share Storage with Family Using iCloud+
With iCloud Family Sharing, you can share one upgraded plan with up to five other family members, each with their own private storage.
To enable:
- Go to Settings > [Your Name] > Family Sharing > iCloud+
- Choose to Share Your Plan
- Invite family members and start managing storage together