Tech Innovations
Discover breakthrough tech innovations, emerging technologies, smart solutions, and future-driven ideas shaping the digital world.
Tenev: Tokenization Marks the Most Important Innovation of the Last Decade
Vlad Tenev: Tokenization represents a shift toward collective empowerment, echoing the evolution of modern heroism. While emphasizing humanity’s potential is vital, meaningful progress demands more than charitable intent it requires systemic innovation, sustainable growth, and structural change.
Why Lithuania Is Setting Bold Ambitions in the Space Technology Sector
Once best known for its medieval castles, vibrant tech startups, and basketball prowess, Lithuania is now reaching for the stars literally. The Baltic nation is making serious moves in the space technology sector, aiming to position itself as a significant player in the European and global aerospace industry.
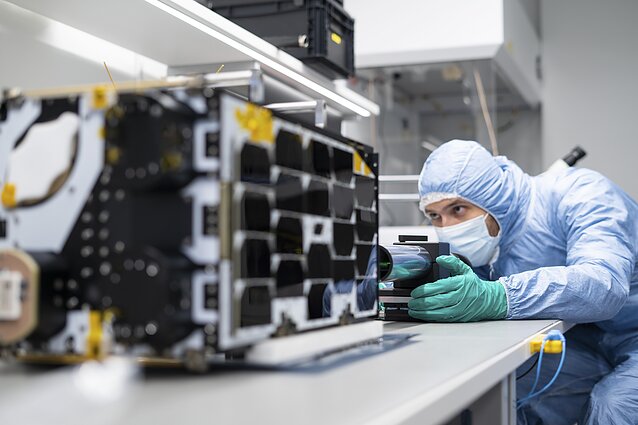
Despite its modest population of just under 3 million, Lithuania is strategically investing in space innovation, with support from both public institutions and private enterprises. The country’s ambitious pivot toward space technology is rooted in its well-established ICT sector, research-driven universities, and membership in the European Space Agency (ESA), which it joined as an associate member in 2021.
“Space tech is no longer reserved for the global superpowers. Smaller nations like Lithuania can now contribute real value,” says Marius Skarupskas, Lithuania’s Vice Minister of Economy and Innovation.
Recent Milestones and Missions
Lithuania has already launched a number of small satellites in collaboration with international partners. The most notable include:
- LituanicaSAT-1 and LitSat-1 – Lithuania’s first-ever satellites, launched in 2014.
- LituanicaSAT-2 – A CubeSat focused on advanced plasma propulsion technology, showing Lithuania’s growing sophistication in satellite engineering.
These missions aren’t just symbolic; they represent a foundation for commercial innovation, particularly in Earth observation, environmental monitoring, and satellite communication.
Strong Academic and Industrial Base
At the heart of Lithuania’s space ambitions is its robust research ecosystem. Vilnius University, Kaunas University of Technology, and Vilnius Tech are developing programs focused on:
- Aerospace engineering
- Artificial intelligence for orbital data processing
- Nano- and microsatellite development
In parallel, Lithuanian companies are partnering with ESA on projects ranging from materials testing in space to satellite data applications for agriculture and disaster prevention.
Collaboration Over Competition
Lithuania’s space strategy is built on international collaboration. Through partnerships with the ESA, NASA, and Nordic space agencies, Lithuanian firms and researchers are gaining access to advanced facilities and orbital missions. The country is also tapping into EU funding, including Horizon Europe and Copernicus data programs, to support startups in the geospatial analytics and satellite imaging sectors.
Dual-Use Technology and National Security
With growing geopolitical tensions in Eastern Europe, Lithuania’s space ambitions also include a defense dimension. Space-based intelligence and surveillance tools are being considered for future defense infrastructure. The Ministry of National Defence has shown interest in using satellite technologies for border monitoring, cybersecurity, and early-warning systems.
A Sustainable Space Vision
In contrast to space races focused purely on dominance, Lithuania is emphasizing responsible and sustainable space exploration. The government has proposed policies aimed at space debris mitigation, ethical AI use in satellite operations, and open data sharing for climate research.
What’s Next for Lithuania in Space?
With momentum building, Lithuania’s space roadmap for the next decade includes:
- Establishing a national space agency
- Launching more CubeSat missions
- Developing domestic launch capabilities
- Supporting deep-tech startups in the space sector
- Creating a Baltic regional hub for satellite-based services
From the Baltics to the Cosmos
Lithuania may be small in size, but its aspirations are anything but. By combining strategic vision, international collaboration, and deep-tech innovation, the country is carving out a unique identity in the global space economy—one that shows how even the smallest nations can have a stellar impact.
25 New Technology Trends for 2025

The Future of Tech: Evolving Roles and Trends
The rapid pace of technological advancements is revolutionizing the way we work and live. As industries adapt to this dynamic landscape, two key factors are driving change:
- Emerging tech trends: Innovations like AI, cloud computing, and cybersecurity are transforming industries and redefining business models.
- Evolving IT roles: The skills and responsibilities of IT professionals are shifting to keep pace with technological advancements.
Staying Ahead of the Curve
Gartner’s research on strategic technology trends highlights the most influential innovations that will drive business success and industry disruption. By understanding these trends and adapting to the changing landscape, professionals and businesses can thrive in a rapidly evolving world.
How Chip Design Firms Gain from the US-China Policy Shift From Restrictions to Opportunities
The recent relaxation of US export curbs on China has significant implications for chip design firms. Let’s explore how this policy shift creates new opportunities for these companies.

Eased Export Restrictions
The US government’s decision to ease export restrictions on China allows chip design firms to:
- Expand their customer base: With fewer restrictions, chip design firms can now work with more Chinese companies, increasing their potential customer base.
- Increase revenue: By exporting their designs and services to China, chip design firms can generate more revenue and grow their business.
- Enhance collaboration: The policy shift enables chip design firms to collaborate more closely with Chinese companies, leading to potential partnerships and joint ventures.
Benefits for Chip Design Firms
The relaxed export restrictions bring several benefits to chip design firms, including:
- Increased market access: Chip design firms can now access the vast Chinese market, which is a significant opportunity for growth.
- Improved competitiveness: By working with Chinese companies, chip design firms can gain valuable insights and expertise, making them more competitive in the global market.
- New business opportunities: The policy shift creates new opportunities for chip design firms to work on projects that were previously restricted.
Impact on the Chip Design Industry
The US-China policy shift is expected to have a positive impact on the chip design industry, with:
- Increased innovation: Collaboration between US and Chinese companies can lead to innovative solutions and new technologies.
- Growth and expansion: Chip design firms can expand their operations and grow their business, creating new jobs and opportunities.
- Global competitiveness: The policy shift can enhance the global competitiveness of US chip design firms, enabling them to compete more effectively in the international market.
Apple Music Marks 10 Years with New Global Artist Hub to Inspire Creativity and Collaboration

Apple Music is celebrating a major milestone — its 10-year anniversary — with the launch of a brand-new Global Artist Hub, a platform designed to empower musicians, foster collaboration, and deepen the connection between artists and their fans.
A Decade of Innovation and Influence
Since its debut in 2015, Apple Music has transformed the way we discover and experience music. From expertly curated playlists and exclusive releases to real-time lyrics and Spatial Audio, Apple has consistently pushed the boundaries of what a modern music service can offer. Over the past decade, it has become a go-to platform for millions of listeners and a vital tool for artists to reach global audiences.
What Is the Global Artist Hub?
As part of its 10th anniversary celebration, Apple Music is introducing a Global Artist Hub — a centralized digital space built specifically for creators. The aim? To inspire creativity, promote collaboration, and provide tools and insights that help musicians thrive in the streaming era.
This new hub is designed to support artists at every stage of their careers. Whether you’re an emerging talent or an established name, the Artist Hub will serve as a resource for:
• Creative inspiration: Featuring exclusive interviews, behind-the-scenes content, and success stories from artists around the world.
• Educational tools: Including guides on how to make the most of Apple Music’s platform, performance analytics, marketing strategies, and fan engagement tips.
• Collaborative opportunities: A place where artists can find and connect with peers for creative partnerships.
Strengthening the Artist-Fan Connection
A key focus of the new platform is to help artists build stronger relationships with their fans. In an era where audience engagement often happens online, Apple is providing musicians with better tools to share their stories, grow their communities, and get discovered — not just by algorithms, but by people who care about music.
Why It Matters
The launch of the Global Artist Hub reflects Apple Music’s ongoing commitment to artist empowerment. As the industry shifts, Apple continues to position itself as more than just a streaming service. It’s becoming a partner to the creative community — offering not only distribution, but also education, support, and a sense of shared purpose.
With this initiative, Apple is sending a clear message: the next 10 years of Apple Music will be as artist-focused and innovation-driven as the first.
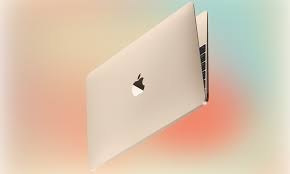
Apple Prepares Affordable 13-Inch Laptop Powered by iPhone’s A18 Pro SoC
Apple is Building a Budget MacBook with an iPhone Chip — Here’s What We Know
Apple is gearing up for a bold new move in its Mac lineup: introducing a budget-friendly 13-inch MacBook powered not by its usual M-series chips, but by the A18 Pro — the same SoC found in its current flagship iPhones.
This marks Apple’s first major attempt at making an affordable MacBook by repurposing smartphone-grade silicon, aiming to strike a balance between cost, performance, and style — especially for students and casual users.
Why the A18 Pro Chip?
Instead of using a custom M-series processor like the M2 or M3, this new MacBook will be powered by the A18 Pro, a chip originally designed for the iPhone 16 Pro lineup.
This strategy allows Apple to:
• Lower manufacturing costs by utilizing existing chip production.
• Deliver solid performance for everyday tasks, such as web browsing, word processing, video streaming, and light productivity.
• Maintain battery efficiency and passive cooling, since the A18 Pro is optimized for mobile devices and doesn’t require a fan.
While the multi-core performance of the A18 Pro lags behind Apple’s desktop-class M-series chips, its single-core performance is competitive with the new M4, making it a smart choice for light to moderate computing.
What to Expect from the New 13-inch MacBook
Apple’s entry-level MacBook will likely look and feel like a slimmed-down MacBook Air:
• 13-inch display (approximate)
• Unibody aluminum design
• Minimal or no visible vents due to passive cooling
• Multiple color options reminiscent of the iMac lineup — including silver, blue, pink, and yellow
The device is expected to focus on portability, simplicity, and appeal to younger demographics and educational institutions.
Production Timeline & Sales Outlook
According to reliable analyst Ming-Chi Kuo, Apple is targeting late Q4 2025 or early Q1 2026 for the start of mass production.
This model is a key part of Apple’s strategy to:
• Reinvigorate MacBook shipments, which have slowed since the pandemic.
• Return to pre-pandemic highs of ~25 million Mac units shipped annually by 2026.
• Sell 20 million MacBooks in 2025, with 5–7 million expected to come from this new entry-level 13-inch model alone.
That would make this laptop one of the most important product launches in Apple’s Mac division for 2025.
Performance Expectations: Will It Be Enough?
Though the A18 Pro isn’t built for heavy workloads like video editing or software development, it should handle basic computing tasks with ease:
• Smooth multitasking
• Instant-on performance
• Long battery life
• Seamless integration with iCloud, iMessage, and Apple ecosystem features
This MacBook could become the ideal lightweight companion for students, casual users, and even enterprises looking for fleet deployment options.
Final Thoughts
Apple’s decision to repurpose its iPhone chip architecture for a MacBook represents a pivotal evolution in its product strategy. By lowering the entry barrier, Apple can attract new users while keeping quality and experience intact.
If successful, this new 13-inch model could reshape how we think about MacBooks — not just as premium tools, but also as accessible, everyday devices.
Stay Tuned
With production expected to begin in late 2025, we’re likely to hear more about this device in early 2026 — possibly during a Spring product event or via press release. Keep an eye out for updates as Apple gets ready to launch what could be its most affordable MacBook yet.
How does GPS trackers work?

Understanding GPS Tracking Technology
GPS trackers work by connecting to a network of satellites orbiting the Earth, which transmit signals to determine the device’s precise location. Here’s a simplified breakdown¹:
How GPS Trackers Function
- Signal Reception: GPS trackers receive signals from multiple satellites, using the time it takes for signals to travel to calculate its exact location through trilateration.
- Location Calculation: The device calculates its latitude and longitude coordinates based on the signals received.
- Data Transmission: The calculated location is transmitted via cellular networks or satellite communication to a central server or user device.²
Key Components of a GPS Tracker
- GPS Receiver: Captures signals from satellites to determine location.
- Communication System: Sends location data to a server or paired device via cellular networks, Wi-Fi, or Bluetooth.
- Power Source: Provides energy to the device, typically via rechargeable batteries or vehicle power systems.³
Applications of GPS Trackers
- Vehicle Tracking: Tracks vehicles, monitors fuel usage, and ensures timely deliveries.
- Personal Safety: Provides real-time location updates for children, elderly individuals, or hikers.
- Theft Recovery: Helps locate stolen vehicles or valuable assets.
- Pet Monitoring: Tracks pets to ensure they don’t wander too far.
How to delete an App from a smart screen
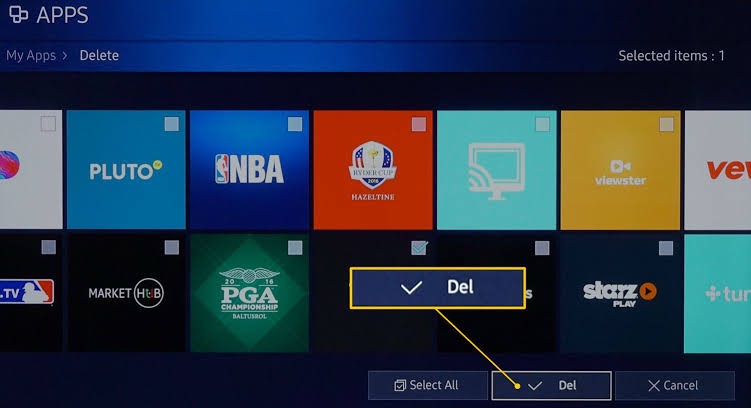
To delete an app from a smart screen, follow these general steps (the exact steps may vary depending on your device and its operating system):
Steps to Delete an App
- Access the app menu: Go to the home screen or app drawer on your smart screen.
- Find the app: Locate the app you want to delete.
- Press and hold: Press and hold the app icon until options appear.
- Select “Uninstall” or “Remove”: Choose the option to uninstall or remove the app.
- Confirm: Confirm that you want to uninstall the app.
Alternative Method
If the above steps don’t work, you can also try:
- Go to Settings: Access the device’s settings menu.
- Find the app manager: Look for the app manager or application settings.
- Select the app: Choose the app you want to delete.
- Uninstall: Select the option to uninstall the app.
Note
Some apps may not be removable, especially if they’re built-in or system apps.
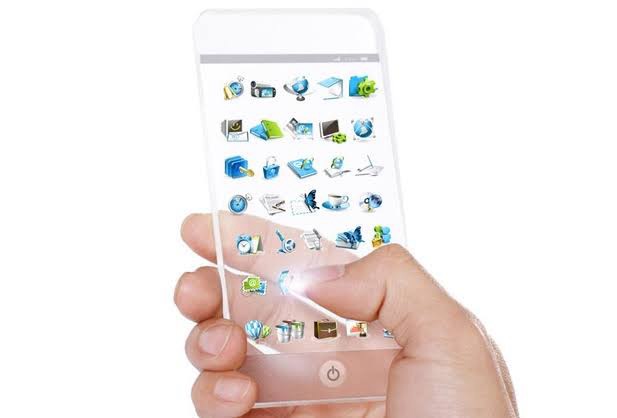
12 Futuristic Features Coming Soon To Smartphones
It’s pretty clear that smartphones will soon be getting even smarter. In the mid 2000s, mobile phones could only do a tiny fraction of the things that their modern counterparts are capable of. Now, thanks to a number of recent technological advancements, it looks as though there will be no shortage of new smartphone features in the future to keep us evermore attached to our little digital devices. Here are 12 you should watch out for.
12. Photonic Crystal Displays
While most current smartphone screens are capable of displaying a wide range of incredibly saturated colors, most of them don’t adapt too well to varying light conditions. Research and development is now pointing to photonic crystals as the answer to this limitation.
Instead of giving off bright light like LCD or OLED displays, a photonic crystal display features nanostructures that adapt and modify themselves according to the amount of ambient light in a given environment. Although the photonic screen requires an external light source in order to be visible, this could easily be integrated into the body of the phone just like it is in e-readers like the Kindle Paperwhite.
Advertisement
To give you an idea of how close this technology is to market, Apple and Google have been making some pretty big investments in photonics, and, back in 2013, Samsung had already demonstrated the concept of a flexible phone that utilized a photonic crystal display. Chances are we’ll start seeing these displays put into smartphones within the next few years.
11. Nano-Tech Batteries
In 2015, at the Mobile World Congress event, Israeli tech company StoreDot revealed a customized Samsung Galaxy S5 with a nano technology-utilizing battery that could charge from 0 to 100 percent in less than a minute.
The technology evolved out of research being conducted in the treatment of Alzheimer’s disease. Through their study, scientists learned that peptide molecules, which are responsible for the disease, have an incredibly high capacitance—making them excellent little electrical storage units. The only catch is that, in its current state of development, the StoreDot battery only lasts about two-thirds of the time of a conventional lithium-ion smartphone battery. However, it shouldn’t take too long for the company to improve the technology. StoreDot has already received substantial investments from Samsung, and is in discussions with manufacturers about integrating its battery into future smartphones.
Advertisement
10. Liquid Buttons
Years ago it was the norm that most phones had physical keyboards and any mobile device without one seemed “out of touch.” But currently the opposite is true, and most people think that tactile keyboards look old-fashioned. Well, that’s all set to change again thanks to Tactus Technology and their development of a keyboard that looks like it came from some sort of advanced alien civilization.
The keyboard uses special microfluidics technology which drives small amounts of liquid into invisible pockets that rest over the typing pad on a smartphone. When the user brings up the touchscreen keyboard, the pockets instantly fill with liquid which has the effect of physically raising the buttons. The technology has already been incorporated into a new Phorm case for the iPad Mini, but it wouldn’t be too much of a stretch to see it directly built in to future smartphones and tablets.
Advertisement
9. Headphone Surround Sound
Surround sound on headphones has been met with some pretty harsh assessments in the past, but now audio developer DTS is looking to silence the critics with a 7.1 mobile audio solution for smartphones that promises to faithfully recreate the sound of specific listening environments using even the simplest pair of headphones. Though there’s a little ways to go before the system works with all source material, the higher processing power of new smartphones should be able to support the advancement in audio technology.
Advertisement
8. Biometric Authentication
Though the iPhone 6 and the Samsung Galaxy S6 both use capacitive technology to read the ridges of your finger tips, this technology could be considered lacking from a security perspective because it doesn’t use enough data points, which makes it more susceptible to being hacked. Improving on the concept, telecommunications company Qualcomm has developed a new type of ultrasonic fingerprint scanner using a piezoelectric layer that creates ultrasound. In addition to mapping your finger, the scanner features greatly increased resolution, which is also an enhanced security benefit.
Advertisement
7. Virtual Reality
With soon-to-be-released headsets like Oculus Rift, Playstation VR and HTC Vive stealing all the virtual reality-related headlines, not much attention has been given to the VR technology on smartphones. Nonetheless, the new 4K displays that will be rolling out on new smartphones in 2016 are ideal for VR applications.
Once inserted into a head-mounted device, the phone itself will act as the VR headset’s display and 4K resolution will be instrumental in providing an immersive, non-pixellated experience. Of course, this may or may not be a good thing considering a lot of us already bury our faces in our phones and ignore what’s going on in the world around us.
Advertisement
6. Graphene
Since its development for practical application in 2004, graphene has been praised as “wonder material” by nearly everyone in the electronics industry. It’s thin, lightweight, flexible, transparent and over 200 times stronger than steel. It’s also one of the best materials for conducting electricity, which makes it ideal for use in electronic devices.
Incorporating graphene into smartphones could allow for designs to be ultra-thin, transparent, flexible and virtually indestructible. Recently, there have been a few breakthroughs by phone manufacturers who have been playing around with graphene. Most notably, Samsung’s Advanced Institute of Technology (SAIT) produced graphene in a way that allowed it to retain its outstanding electrical qualities—a problem that had proved to be a serious challenge up to that point. This development should make flexible, transparent smartphone displays commercially viable within the next couple of years.
Advertisement
5. No SIM Cards
Although manufacturers have made efforts to reduce the size of SIM cards, they still feel very much like a leftover relic of the ’90s. Thankfully, Apple and Samsung are making strides to rid the world of the physical presence of SIM cards by replacing them with an electronic version.
By having a programmable SIM integrated into your phone, you’ll essentially be able to switch between network providers at the drop of a hat without having to request a new SIM card. Which should come in quite handy for anyone travelling or living abroad who wants to get set up with a local number. It’s said that the technology could be available in new smartphones as early as next year.
Advertisement
4. Pressure-Sensitive Screens
The Force Touch on the Apple Watch has demonstrated that companies already have the ability to manufacture screens that are capable of sensing pressure. Controls that can distinguish between a light tap from a firm press will give users even more ways to manipulate their phones and has obvious benefits for the gaming community.
In addition to Apple, Samsung has filed a patent for something called “Touch Display Apparatus Sensing Force,” which clearly uses the same technology, and in July 2015, Chinese manufacturer ZTE revealed the ZTE Axon Mini which also features a pressure-sensitive touch screen.
Advertisement
3. Flawless Voice Interaction
Voice interaction has been around for a while now and incremental improvements over the years have led to the development of virtual personal assistants and knowledge navigators like Apple’s Siri. But that’s just the tip of the iceberg. The algorithms used in voice-assisted applications are moving ahead at break-neck speed. With the technology improving so quickly, it won’t be long before the A.I. becomes so intuitive that it will start giving you advice that seems to pre-empt your very thoughts. Let’s just hope that the developers remember to program Asimov’s three laws of robotics into them so we don’t wind up subservient to our smartphones in the future.
2. Innovative Medical Apps
Recently, scientists developed an app called Athelas which makes use of a lens attachment to track malaria and cancerous cells as they move through a patient’s blood. This innovation has prompted scientists to look for other ways that smartphones could be used to track highly infectious diseases, such as Ebola, to gain a better understanding of how they move and spread.
Using an inexpensive phone add-on called PCR that’s able to tag and track pathogens in the blood, diseases should be able to be diagnosed within hours or even minutes. The data gathered would then be automatically uploaded from the phone to an online database where other scientists can analyze it.
When you combine this emerging technology with other existing applications that are able to track things like blood-pressure and heart rate, it’s easy to see how smartphones could soon bring about a revolution in medical care.
1. Smart Cameras
In 2015, Qualcomm demoed a camera that showed it was capable of identify the objects it was looking at. The system works by comparing real world objects to a huge reference database stored on the device. Best of all, it’s possible to train the software to understand ever more things. Sort of like a little baby A.I.
This technology could have enormous potential and enable cameras to do all sorts of clever and useful things relating to the real world environment. Google has also been developing a similar type of deep search identification software with Google Photos. As camera hardware continues to shrink and improve, it seems inevitable that this sort of feature will become standard on phones.