Tech Innovations
Discover breakthrough tech innovations, emerging technologies, smart solutions, and future-driven ideas shaping the digital world.
25 New Technology Trends for 2025

The Future of Tech: Evolving Roles and Trends
The rapid pace of technological advancements is revolutionizing the way we work and live. As industries adapt to this dynamic landscape, two key factors are driving change:
- Emerging tech trends: Innovations like AI, cloud computing, and cybersecurity are transforming industries and redefining business models.
- Evolving IT roles: The skills and responsibilities of IT professionals are shifting to keep pace with technological advancements.
Staying Ahead of the Curve
Gartner’s research on strategic technology trends highlights the most influential innovations that will drive business success and industry disruption. By understanding these trends and adapting to the changing landscape, professionals and businesses can thrive in a rapidly evolving world.
What Are the Top 25 Emerging Technologies in 2025?
- Generative AI
- Quantum Computing
- 5G Expansion
- Virtual Reality (VR) 2.0
- Augmented Reality (AR)
- Internet of Things
- Biotechnology in Agriculture
- Autonomous Vehicles
- Blockchain
- Edge Computing
- Personalized Medicine
- Neuromorphic Computing
- Green Energy Technologies
- Wearable Health Monitors
- Extended Reality (XR) for Training
- Voice-Activated Technology
- Space Tourism
- Synthetic Media
- Advanced Robotics
- AI in Cybersecurity
- Digital Twins
- Sustainable Technology
- Telemedicine
- Nano-Technology
- AI TRiSM
Key Technology Trends in the Automotive Industry in 2025

The automotive industry is rapidly evolving, driven by technological advancements, sustainability concerns, and changing consumer demands. Here are the key technology trends shaping the industry in 2025:
Electrification and Sustainable Mobility
- Electric vehicles (EVs) are projected to account for nearly 25% of all new car purchases, with improved battery efficiency, faster charging infrastructure, and longer range.
- Automakers are investing in solid-state battery technology, offering higher energy density, faster charging, and enhanced safety.
- Sustainability extends beyond powertrains, with eco-friendly materials, recycled components, and sustainable manufacturing processes becoming increasingly important.¹ ²
Connected Cars and IoV
- Vehicles are becoming more connected through integrated cellular, Wi-Fi, and 5G connectivity, enabling real-time data sharing, advanced navigation, and seamless integration with digital lifestyles.
- The Internet of Vehicles (IoV) improves safety, traffic management, and driving efficiency through vehicle-to-vehicle (V2V) and vehicle-to-infrastructure (V2I) communication.
Artificial Intelligence and Predictive Systems
- AI plays a growing role in modern automotive systems, from predictive maintenance alerts to AI-powered navigation and personalized driving experiences.
- AI-powered design tools and intelligent systems are being adopted to optimize efficiency, enhance safety, and meet evolving consumer demands.³
Autonomous Driving and Advanced Driver Assistance Systems (ADAS)
- Autonomous vehicles are becoming a reality, with companies like Tesla and Waymo investing heavily in AI, sensors, and machine learning.
- ADAS technologies, such as adaptive cruise control and lane departure warning, are increasingly standard even in mid-range cars.⁴
Enhanced In-Car Experience
- Cars are becoming more personalized, with features like voice assistants, augmented reality dashboards, and customizable climate zones.
- Luxury segments are experimenting with in-car entertainment systems, gesture control, and autonomous driving lounge modes.
Software-Defined Vehicles
- Cars are increasingly controlled and enhanced by software, allowing for over-the-air updates, new features, and personalized driving experiences.
- Integration with 5G and IoT enables real-time data sharing and advanced navigation.
These trends are transforming the automotive industry, shaping the future of driving, and redefining the relationship between vehicles, drivers, and the environment.
Which Reigns Supreme? iPhone 16 Pro Max vs S25 Ultra
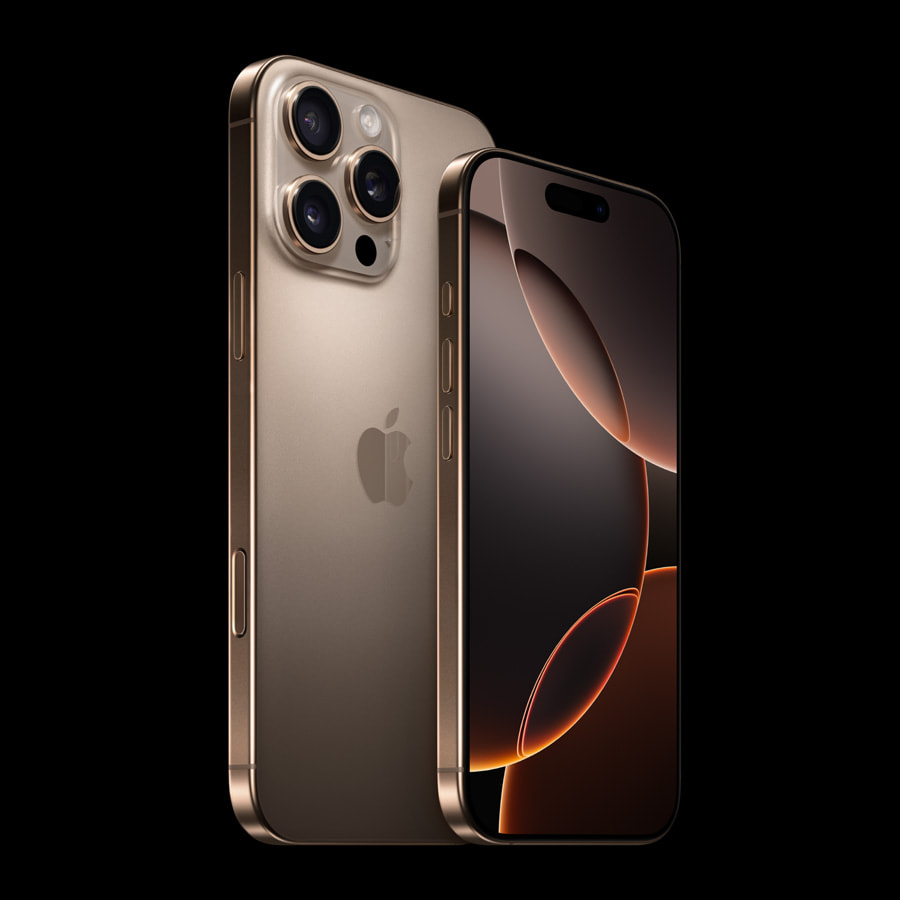
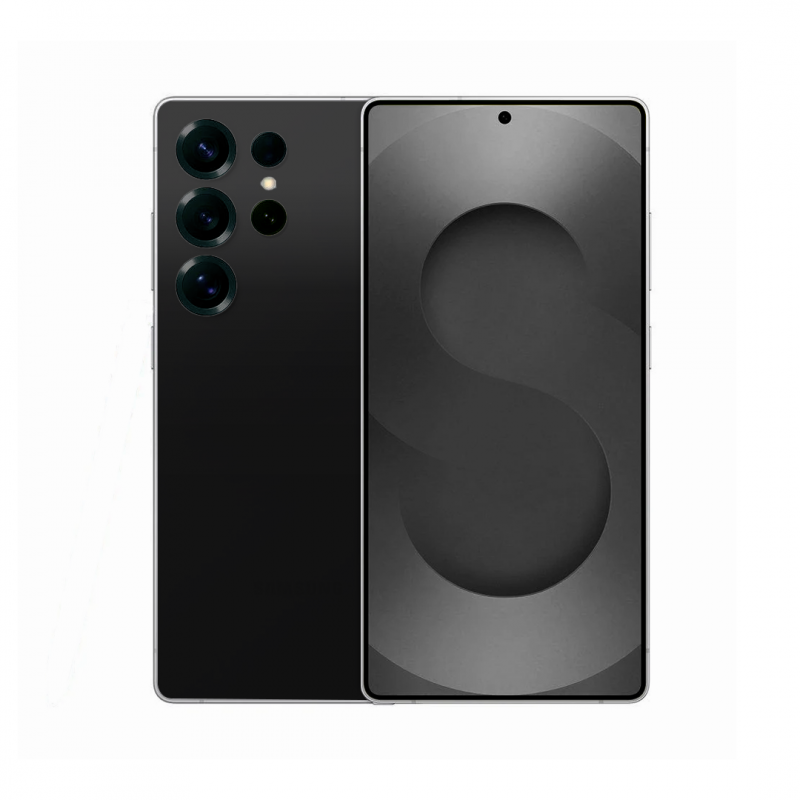
Design and Display
- iPhone 16 Pro Max: Features a 6.7-inch Super Retina XDR display, with a stainless steel frame and tough glass.
- Samsung S25 Ultra: Boasts a 6.8-inch Dynamic AMOLED display, with a large 6.8-inch screen and Corning Gorilla Glass Victus.
Performance
- iPhone 16 Pro Max: Powered by Apple’s A18 Bionic chip, delivering fast performance and efficiency.
- Samsung S25 Ultra: Runs on a powerful Qualcomm Snapdragon or Samsung Exynos processor, offering high-performance capabilities.
Camera Systems
- iPhone 16 Pro Max: Features a quad-camera setup with advanced photography capabilities, including a telephoto lens.
- Samsung S25 Ultra: Equipped with a quad-camera system, including a high-resolution primary sensor and advanced zoom capabilities.
Battery Life
- iPhone 16 Pro Max: Offers up to 12 hours of internet use, with fast charging capabilities.
- Samsung S25 Ultra: Features a large battery with long-lasting battery life and fast charging support.
Software
- iPhone 16 Pro Max: Runs on iOS, known for its ease of use and seamless integration with other Apple devices.
- Samsung S25 Ultra: Operates on Android, offering customization options and integration with Samsung’s ecosystem.
Danny Boyle’s view on using smartphones to shoot blockbuster movies
Danny Boyle, a renowned film director, has explored the use of smartphones in filmmaking.
iOS 26 Integration: New AirPods Pro 2 Beta Firmware Available
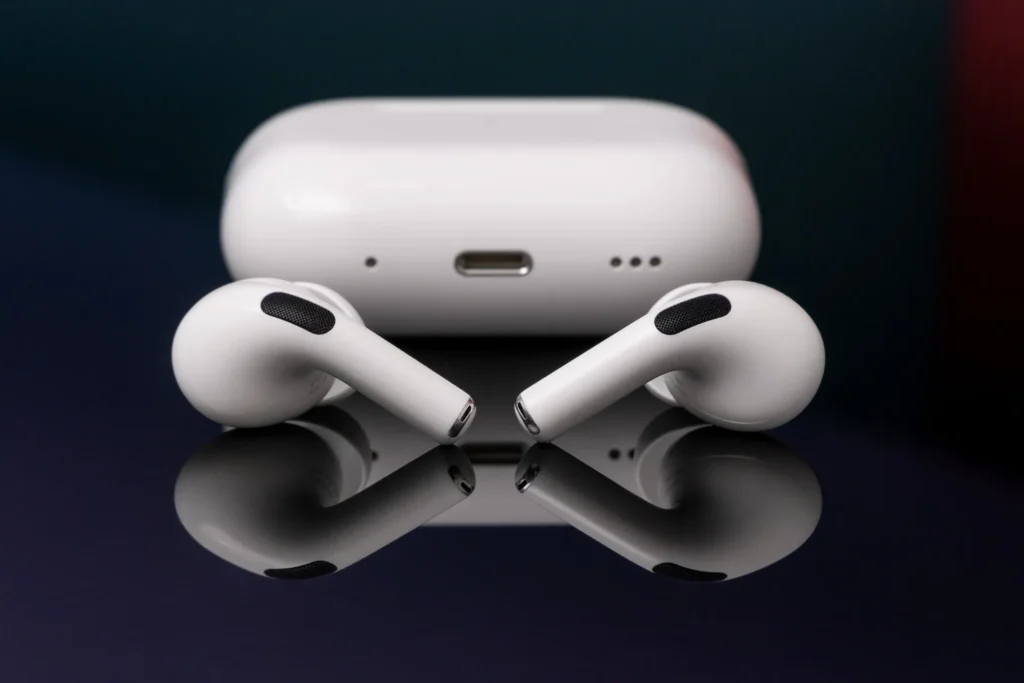
iOS 26 AirPods Features: New Beta Firmware Released for AirPods Pro 2 and AirPods 4
Apple has rolled out a new firmware build for AirPods Pro 2 and AirPods 4 users, introducing several exciting features that are currently being beta tested by developers. This is the second beta update for iOS 26-ready AirPods firmware, following the initial release earlier this month.
What’s New in the Latest Beta Firmware?
The new firmware, build number 8A293c, builds upon the features introduced in the previous beta version, including sleep detection and camera remote functionality. These innovative features aim to enhance the overall user experience and provide seamless integration with iOS 26.
Enabling AirPods Beta Updates
If you’re running the iOS 26 beta on your iPhone or macOS Tahoe/iPadOS 26 on your iPad, you can easily opt-in for AirPods beta updates. Simply navigate to the Settings app and follow the prompts to enable beta updates. Keep in mind that beta software can be prone to bugs and performance issues, so proceed with caution.
User Experience with Beta Firmware
Some users have reported connectivity issues with their AirPods after installing the beta firmware. If you’re experiencing similar problems, it’s essential to note that beta software can be unstable. However, many users are eager to test new features and provide feedback to help Apple refine the final product.
Have You Installed the New Firmware?
We’re curious to know about your experience with the new AirPods firmware. Have you installed the update, and if so, how’s it running for you? Share your thoughts and feedback in the comments below.
Recommended AirPods Deals and Accessories
- AirPods Pro 2: Now $199 (was $249)
- Memory Foam Eartips: For a more comfortable fit
- Magnetic Strap Neckband: Prevent lost AirPods
- AirFly Pro 2: Connect AirPods to standard headphone jacks
- Belemay Leather Case: Protect your AirPods Pro in style
Apple Music Widget Now Available: iOS 26 Beta 2 Update
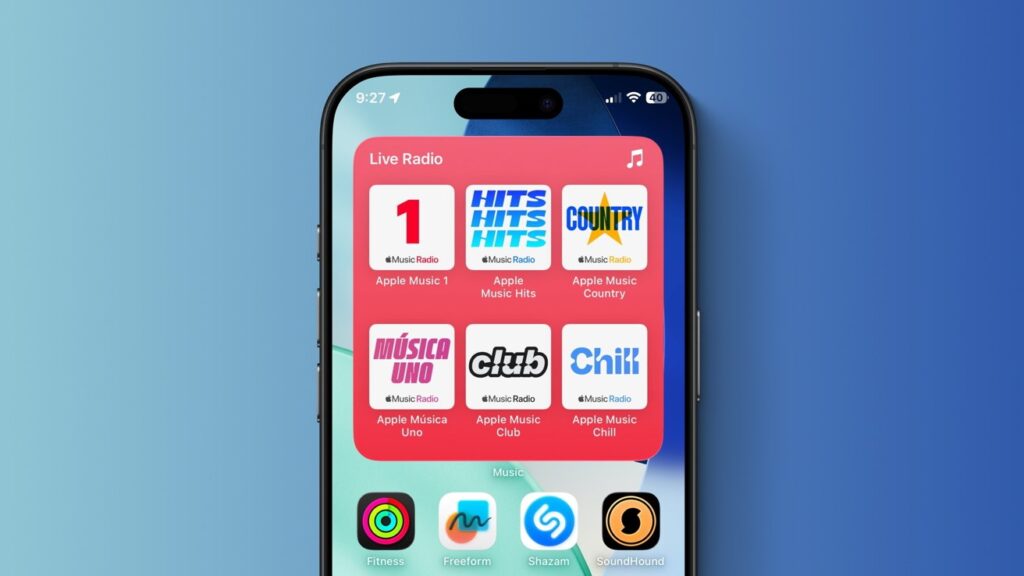
iOS 26 Beta 2: Apple Music Gets a Boost with New Live Radio Widget
Apple’s latest iOS 26 beta 2 release is packed with refinements and exciting new features, particularly for Apple Music users. The new Live Radio widget is the third addition to the Apple Music widget lineup, joining the Pins medium and large widgets introduced in beta 1.
Live Radio Widget: Quick Access to Your Favorite Stations
The Live Radio widget offers quick access to Apple Music’s six 24/7 live radio stations:
- Apple Music 1
- Apple Music Hits
- Apple Music Country
- Apple Música Uno
- Apple Music Club
- Apple Music Chill
This widget is currently available in a large size, allowing you to tune in to your favorite radio stations with just a single tap.
Other Apple Music Enhancements
iOS 26 is shaping up to be a significant release for Apple Music users, with features like:
- AutoMix: A new feature that creates seamless transitions between songs.
- Pinned Music: Quickly access your favorite songs and playlists.
- Playlist Folder Creation: Organize your playlists with ease.
Availability and Conclusion
The new Apple Music widget and features are available in iOS 26 beta 2 for registered developers, with the public beta expected to follow in early July 2025. The final release is anticipated to ship with the iPhone 17 series in mid-September 2025.
Whether you’re an avid Apple Music user or just discovering the platform, iOS 26’s new features and widgets are sure to enhance your listening experience. Do you listen to Apple Music’s radio stations? Share your thoughts in the comments!
Recommended iPhone Accessories
- AirPods Pro 2: Now $199 (was $249)
- MagSafe Car Mount for iPhone
- HomeKit Smart Plug 4-Pack
- 10-Year AirTag Battery Case 2-Pack
- 100W USB-C Power Adapter for Fast Charging
Liquid Glass Redefined: What’s New in iOS 26 Beta 2

The Liquid Glass interface in iOS 26 Beta 2 brings significant improvements, enhancing the overall user experience. Here’s what’s new:
Key Enhancements
- Streamlined Design: A cleaner and more intuitive visual design prioritizes content clarity.
- Improved Animations: Smoother transitions and animations create a more seamless experience.
- Enhanced Customization: Users can personalize their interface with new options for themes, colors, and layouts.
- Increased Responsiveness: The interface is more responsive, providing a faster and more interactive experience.
Benefits
- Improved User Experience: The Liquid Glass interface is designed to be more intuitive and user-friendly.
- Enhanced Visuals: The new design and animations create a more visually appealing experience.
- Increased Productivity: The streamlined interface and improved responsiveness enable users to navigate and interact with their devices more efficiently.
Availability
The Liquid Glass interface improvements are available in iOS 26 Beta 2, which can be accessed by:
Final Release: Anticipated to ship with the iPhone 17 series in mid-September 2025 [7].
Registered Developers: Can download the beta version now.
Public Beta Testers: Expected to receive the public beta in early July 2025.
Apple Unveils iOS 26 Beta 2: New Features and Enhancements
Apple’s iOS 26 Beta 2 brings a plethora of exciting features and enhancements to the table. Here’s a detailed breakdown:
Design Revamp: Liquid Glass
- Overview: The Liquid Glass interface is a major visual overhaul, providing a seamless user experience with a clean and intuitive design.
- Key Features: System-wide visuals have been redesigned, including the Lock Screen, Home Screen, Control Center, and app icons, prioritizing content clarity.
- Customization: Users can choose between light and dark themes, color-tinted icons, and a streamlined aesthetic.
Enhanced Apps
- Phone App:
- Hold Assist: Notifies users when a live agent is available during support calls.
- Call Management: Improved tools for filtering unwanted calls.
- Messages App:
- Poll Creation: Users can create polls in chats, including group chats.
- Customizable Chat Backgrounds: Personalize your conversations.
- Apple Music:
- AutoMix: Seamless transitions between songs.
- Lyrics Translation & Pronunciation: Enjoy lyrics in your preferred language.
- Auto-Pin Favorite Songs: Quickly access your favorite tunes.
- Live Radio Widget: Tune in to your favorite radio stations.
Other Notable Features
- Siri Upgrades: More contextually aware and natural-sounding Siri with improved on-screen interaction.
- Password Manager: A dedicated Passwords app for centralized credential management.
- Wallet App: Track your online orders with automatic tracking information from the Mail app.
- Safari Updates: Relocated tab button, “Close Tab” option, and back and forward buttons.
- Journaling App: Supports iCloud sync on iPads.
- Low Power Mode: Updated description provides more insight into its functionality.¹ ²
Availability and Compatibility
- Developer Beta: Available now for registered developers.
- Public Beta: Expected to launch in early July 2025.
- Final Release: Anticipated to ship with the iPhone 17 series in mid-September 2025.
How does the Goal Line technology work?
Goal-line technology (GLT) uses a combination of high-speed cameras and sometimes magnetic field sensors to determine if a ball has completely crossed the goal line. When the ball’s position indicates it has crossed the line, a signal is sent to the match referee’s watch, providing a clear “goal” or “no goal” indication within a second.
Goal Line Technology
The speed at which a football travels when kicked by a modern professional football player has been measured; the average speed is around 60 mph. However, a real sharpshooter can propel the ball up to and over 80 mph; speeds of over 100 mph have been recorded by a rare few (Lisbon’s Brazilian left-back, Ronny Heberson leads the pack with a goal-smashing kick of 131.82 mph taken in 2006). This speed means that during a penalty kick, the ball will reach the goal line in half a second (500 milliseconds) – blink and you miss it.
A goal is awarded when the ‘whole’ ball passes over the goal line, between the goalposts, and under the crossbar. If the ball does not ‘fully’ cross the plane created by the goalposts and crossbar, a goal is not awarded.
When you consider that the total duration of an eye blink is around 200 milliseconds, is the referee or linesman always going to see a ball travelling so swiftly, let alone fully crossing that line so that a goal can be awarded?
The final decision to award a goal is down to the referee. Throughout the history of the game, there have been controversial goal award decisions, and those few wrong decisions can change the whole course of tournaments and competitions. Just ask Frank Lampard, his goal was wrongly disallowed against Germany at the 2010 World Cup in South Africa possibly costing England their match.
In recent times, however, modern technology has come to the rescue – computers and microprocessors can react in microseconds – thousands of times quicker than a referee…and they don’t blink!
Today we have Goal Line Technology (GLT), a system that helps the referee to get that decision right when it matters the most.
The technology required for GLT has been available for over 20 years. Using camera-based technology, it was originally developed and used for sports such as cricket and tennis.
In 2006, the International Football Association Board (IFAB) permitted tests to be carried out at matches during the 2006/2007 football season. These tests proved successful, but, disappointingly, in 2008, the IFAB ruled that GLT could not be used.
However, following some crucial decision making during the 2010 World Cup, this ruling was revisited. And, in 2012, following international testing, the IFAB decided that GLT could be introduced into football.
The uptake on this new system was rapid, and GLT systems are now in use worldwide. Some of these systems are expensive, and so they are only found at Premier league and association grounds and those used during major international competitions.
There are two main makes of GLT – camera-based and magnetic – available and accepted by FIFA as being fit for use.
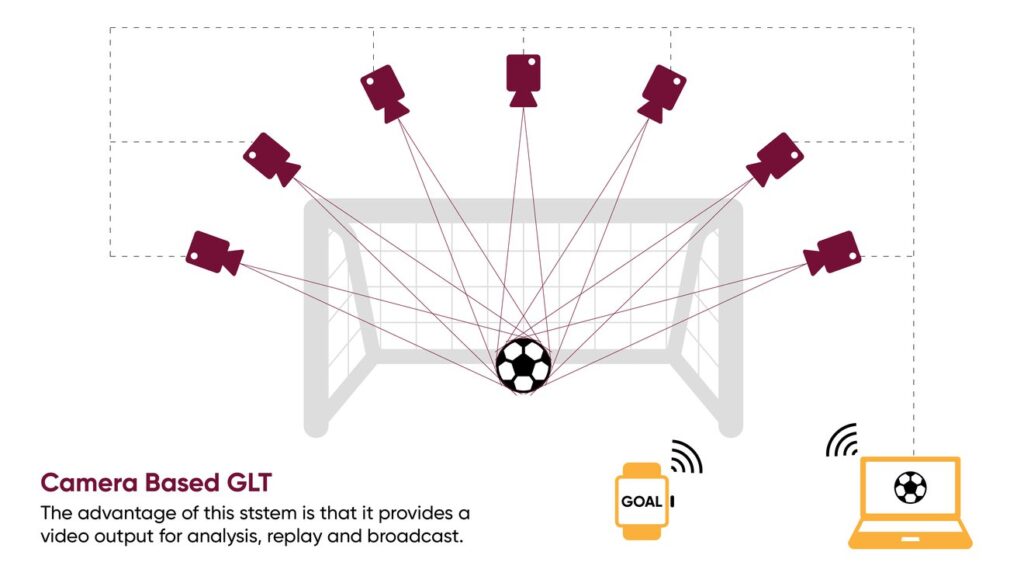
Camera-Based
This system uses computer-linked high-speed cameras. Generally, there are fourteen cameras in total, with seven focused on the goalmouth at either end of the pitch. The function of each camera is to track the football and monitor whether it crosses the goal line under a variety of conditions. The images from each camera are combined to form a very accurate 3D representation of the path of the football. At the point when the ‘whole’ ball crosses the goal-line, a signal is generated by the system computer. This signal is transmitted to the referee’s watch to indicate whether a goal can be awarded. The whole process from goal line to watch all takes place in less than one second – a far cry from the stoppage time usually wasted without the technology.
This camera-based system is so refined that it is unaffected by electrical interference. It can recognise the ball even if it is partly obscured, and it is not affected by poor visibility due to the weather. It can generate images with the players removed for clarity, and it can produce action replays within 10 seconds.
The British invented Hawkeye system and the German Goal Control system are currently FIFA approved brands.
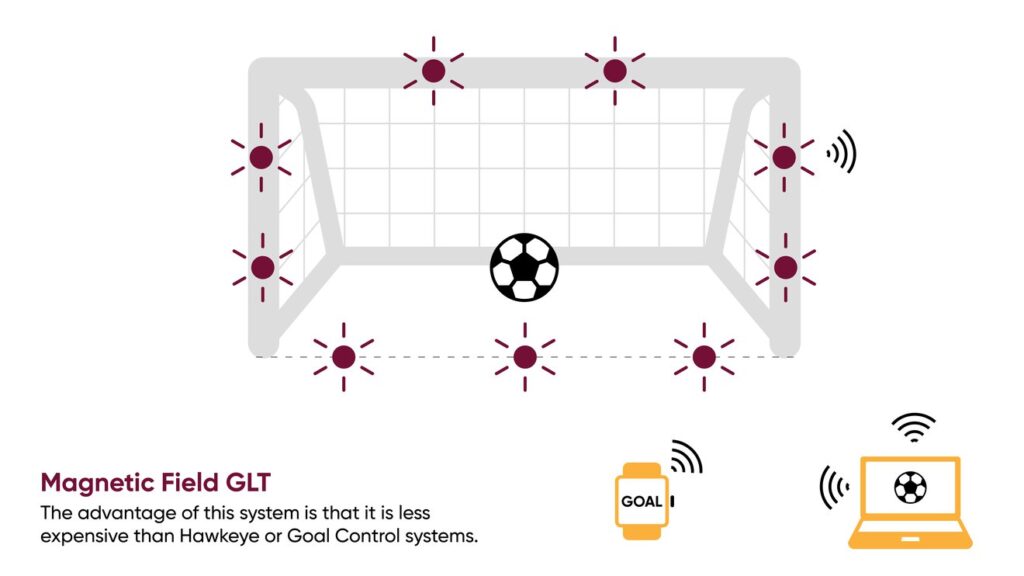
Magnetic Field
Two additional GLT systems, approved by FIFA and using low-frequency magnetic fields in and around the goal, are GoalRef and Carios – both German-owned.
Both are radio-based systems that use a magnetic field to detect when a goal can be awarded.
At the point when the ball crosses the goal-line, the goal mouth magnetic field is disturbed. A signal is generated and transmitted to the system computer, which in turn transmits a signal to the referee’s watch enabling the ‘goal’ allowed or disallowed. The whole process all takes place in less than one second.
The magnetic field is generated either by underground cables and devices installed in the goal frame or via specifically located antennas. The balls used with this system both contain passive electronic circuits – players have confirmed that this does not affect the way that the ball performs. The signals generated by either system are encrypted to prevent unauthorized access or tampering.
The Way Forward?
Goal-line technology is now in fairly common use. Along with Video Assistant Referee (VAR) systems, the decisions being made in football are extremely fair and, generally, accurate.
However, is all this technology really the way that fans want the game to go? Or, are the inaccuracies and the debatable referee decisions all a part of the game that people enjoy to watch? Does the cost of these systems inhibit its use at the grassroots level? The debate rages on for some, but GLT was used during the 2014 and 2018 World Cup tournaments, most top leagues around the world now use it, and it will probably be used during the 2022 World Cup, so it is more than likely here to stay.
If you want to find out more about assisted play, check out our review of VAR Technology.
The Technology Behind ADAS (Advanced Driver Assistance Systems): How It Works
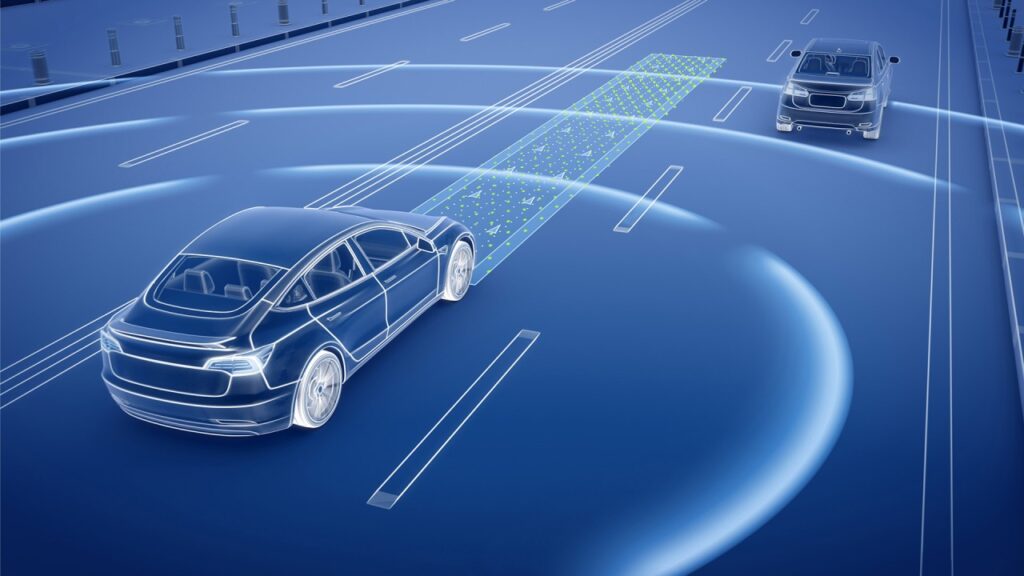
Advanced Driver Assistance Systems (ADAS): Technical Overview and Functionality
Advanced Driver Assistance Systems (ADAS) utilize a sophisticated combination of sensors, cameras, radar, lidar, and onboard computers to enhance road safety and driving experiences. Here’s an in-depth look at how ADAS works:
Key Components and Technologies
- Sensor Suite: Radar, lidar, cameras, and ultrasonic sensors detect obstacles and monitor the vehicle’s surroundings.
- Computer Vision: Cameras read lanes, signs, and traffic, providing visual data for the system.
- Sensor Fusion: Combines input from different sensors to build a comprehensive view of the surroundings.
ADAS Functionality
- Data Collection and Processing: Sensors and cameras gather data, which is then processed by onboard computers in real-time.
- Decision-Making and Control: ADAS decides whether to warn the driver or take control, such as braking or steering corrections.
Advanced ADAS Features
- Adaptive Cruise Control (ACC): Utilizes radar and cameras to maintain a safe distance from the vehicle ahead.
- Lane Centering Assist: Provides precise steering input to keep the vehicle centered in its lane.
- Automatic Emergency Braking (AEB): Detects potential collisions and automatically applies the brakes.
Benefits and Implications
- Enhanced Safety: Reduces human error, a major cause of accidents.
- Improved Driver Experience: Assists drivers in various driving scenarios, reducing stress and fatigue.
- Future Development: ADAS lays the groundwork for fully autonomous vehicles