Tech Solutions
Explore practical tech solutions, smart tools, digital services, and innovative ideas designed to solve everyday and business challenges.
How to transfer data from iPhone to Android phone
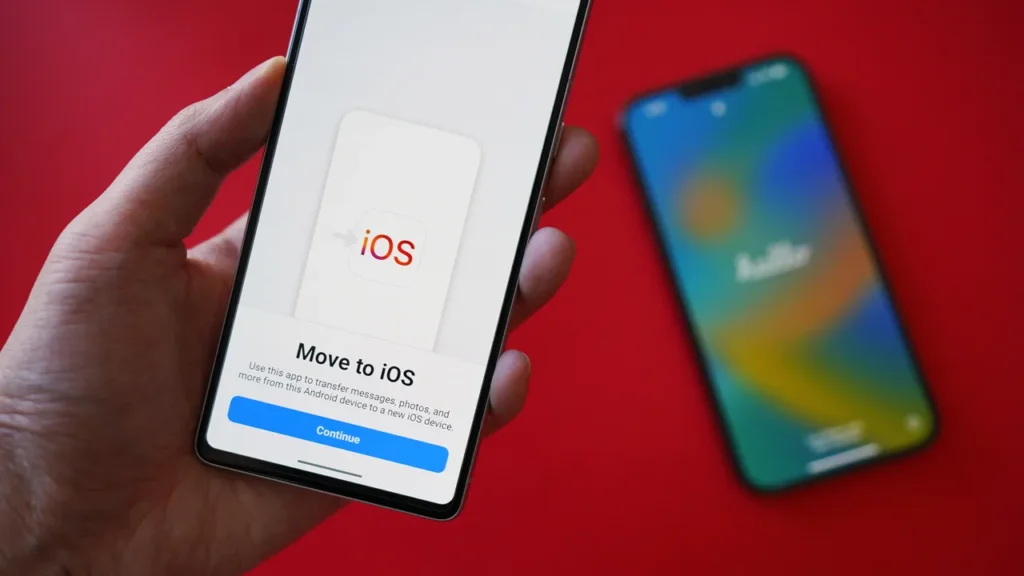
Transferring data from an iPhone to an Android phone can be done in several ways.
Methods for Transferring Data
Using MobileTrans App
- Download and Install: Download the MobileTrans app on both your iPhone and Android phone.
- Connect Devices: Launch the phone and ensure they’re connected to the same Wi-Fi network.
- Select Transfer Direction: Tap “Phone to Phone” and choose “iPhone to Android” as the transfer direction.
- Choose Data: Select the types of data you want to transfer, such as contacts, photos, videos, and music.
- Send Data: Hit “Send” and let the app transfer your data securely.¹
Using Google Drive
- Upload Data: Open Google Drive on your iPhone and upload the data you want to transfer.
- Access Data on Android: Fire up Google Drive on your Android phone and access the uploaded data.
- Download or Move Files: Download or move files/folders from Drive storage to your Android device’s internal storage.²
Using Samsung Smart Switch
- Download and Install: Download the Samsung Smart Switch app on both devices.
- Connect Devices: Connect both devices and select the transfer direction.
- Choose Data: Select the data you want to transfer and let the app do the rest.
Other Methods
- iCloud: Transfer data from iPhone to Android using iCloud by uploading data to iCloud on your iPhone and accessing it on your Android device.
- Email: Transfer small files and data using email by sending them from your iPhone and accessing them on your Android device.
- SHAREit: Transfer files between iPhone and Android devices using the SHAREit app.
- Copy My Data: Transfer files over Wi-Fi using the Copy My Data app.
How to Replace back an iMac logic board
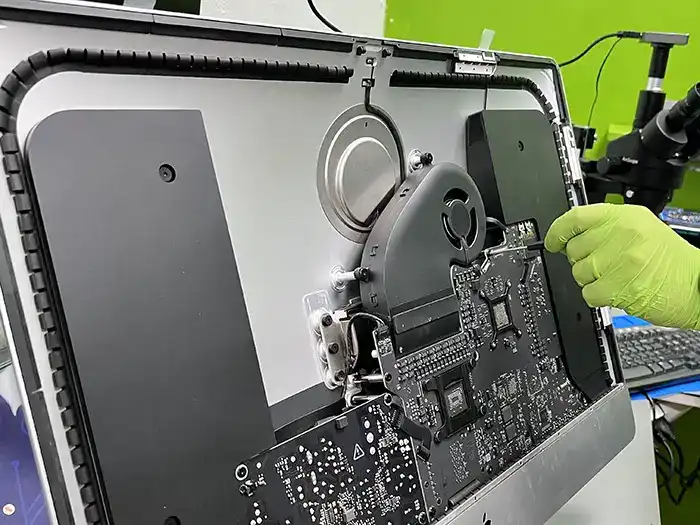
Replacing an iMac logic board is a complex procedure requiring careful disassembly, component removal, and reassembly. It generally involves disconnecting various cables and components, removing the logic board, and then installing the new one, followed by reconnecting everything. Due to the intricacy involved, it’s often recommended to seek professional help from a qualified technician.
Here’s a general outline of the process, which may vary slightly depending on the specific iMac model:
1. Preparation:
- Safety Precautions:Disconnect the iMac from power and ground yourself to prevent static discharge.
- Gather Tools:You’ll need a Phillips head screwdriver, spudger, suction cups, and potentially other specialized tools depending on your iMac model.
- Data Backup:Back up any important data before starting the replacement, as data loss can occur during the process.
2. Disassembly:
- Remove the Display:Carefully detach the display assembly, often requiring specialized suction cups to lift the glass panel, followed by disconnecting the display cable.
- Remove Components:Disconnect various cables and components connected to the logic board, including:
- Power supply.
- RAM modules.
- Hard drive/SSD.
- Optical drive.
- AirPort card.
- Speakers and other peripherals.
- Remove the Logic Board:Once all components are disconnected, locate and remove the screws holding the logic board in place. Carefully lift the logic board out of the iMac.
3. Logic Board Replacement:
- Install the New Logic Board:Place the new logic board into the iMac, ensuring it’s properly aligned and secured with screws.
- Reconnect Components:Reconnect all the components that were previously disconnected, paying close attention to cable routing and connections.
4. Reassembly:
- Reattach the Display:Carefully reattach the display assembly, ensuring all connections are secure.
- Final Checks:Before powering on, double-check all connections and ensure everything is properly installed.
5. Power On and Testing:
- Power On: Plug in the iMac and power it on.
- System Check: Verify that the iMac boots correctly and all components are functioning as expected.
Important Considerations:
- Specific Models:The exact steps and tools required can vary significantly between different iMac models. Refer to a specific repair guide for your iMac model for detailed instructions.
- ESD Protection:Static electricity can damage sensitive electronic components. Always take proper precautions to prevent static discharge.
- Component Damage:Be extremely careful when handling components, especially the logic board, as they are delicate and easily damaged.
- Professional Help:If you are not comfortable with this process, it’s highly recommended to seek help from a qualified technician to avoid potential damage to your iMac.
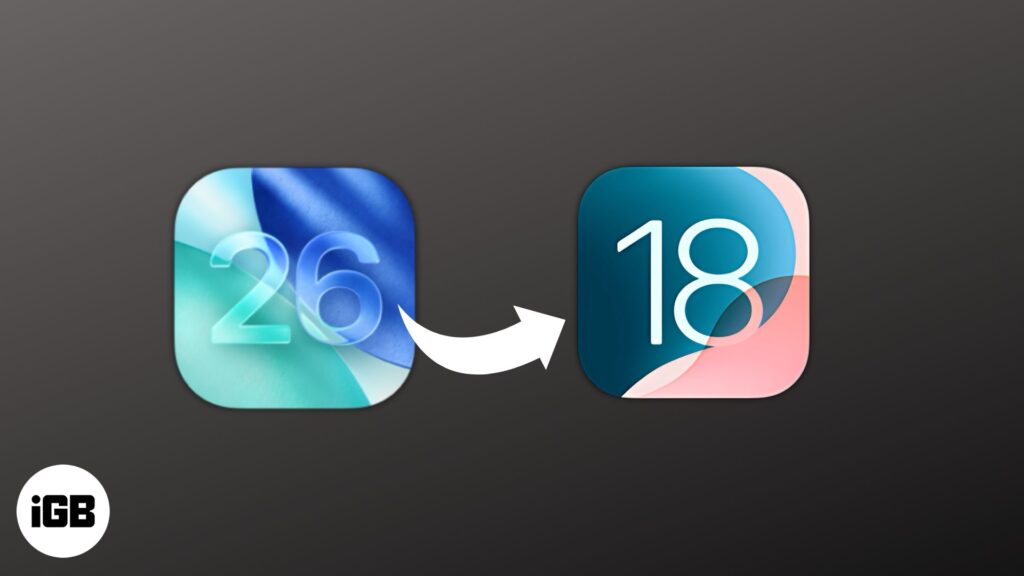
How to Downgrade iOS 26/19 to iOS 18 [No Data Loss] – Free in One Click
Apple has officially released iOS 26 beta, and many users have already rushed to try out the new features. But as exciting as early access sounds, the beta version often comes with bugs, app crashes, or battery drain that can disrupt your daily use. If you’re one of those users who regret downloading the iOS 26 beta, don’t worry—you’re not stuck with it. In this guide, we’ll walk you through exactly how to downgrade iOS 26 beta to iOS 18 safely and without losing your data.
Can You Downgrade from iOS 26 Beta to iOS 18?
Top 3 Ways on How to Downgrade iOS 26 Beta to 18 for iPhone/iPad
- Way 1. Downgrade iOS 26 Beta to 18 Without Data Loss/Jailbreak/iTunes [Best Recommended]HOT
- How to Remove iOS 26 Beta and Restore to the Latest Official Version [Beta Only]
- Way 2. Downgrade iOS 26 Beta to 18 via IPSW Firmware Import [Manually]
- Way 3. Downgrade iOS 26 Beta to 18 via BetaProfiles [Versions Limited]
Bouns Tips. How to Downgrade iOS 26 Beta to 18 Without Computer
Many users wonder if they can downgrade from iOS 26 Beta to iOS 18 without a computer. Unfortunately, because of how Apple manages firmware, downgrades usually require a computer and special software. There’s no official way to fully downgrade over the air once a beta is installed.
You can only remove the beta profile without a computer, but this won’t reinstall an older iOS version. It just stops future beta updates. Here’s how to remove the iOS 26 Beta profile on your iPhone or iPad without a computer:
- Step 1. Head to “Settings” on your iPhone/iPad. Then, choose “General.”
- Step 2. Tap “VPN & Device Management.” Remove the iOS 26 Beta profile. This stops future beta updates.
People Also Ask About How to Downgrade iOS 26 Beta to 18
Q1. Why is it so hard to downgrade iOS?
Downgrading iOS is difficult because Apple stops signing older versions soon after updates. Even with the right file, you can’t install it if Apple no longer approves it. Betas modify system files, so going back usually requires wiping your device. Apple does this for security, limiting downgrade options unless you use risky methods like jailbreaking.
Q2. Can I jailbreak iOS 26 Beta?
Yes, you can jailbreak iOS 26 beta, though currently only a few jailbreak tools support it, and compatibility depends on your device model and chip. Keep in mind that jailbreak options may be limited and require specific steps.
Q3. Can you downgrade iOS without iTunes?
Yes, but only sometimes. You can downgrade from iOS 26 Beta to iOS 18 if Apple is still signing it. Downgrading to stable iOS without iTunes is nearly impossible unless you use tools like Tenorshare ReiBoot, which can do it without data loss.
How to Submit Your ID for Verification

Q. How can I upload my ID after registration?
A: If you have registered for IELTS on paper, please send us your scanned or photographed ID to pginfo@britishcouncil.me.
How to Enable Advanced Security Features on iCloud

To enable advanced security features on iCloud:
Two-Factor Authentication (2FA)
- Go to Settings on your iPhone or iPad.
- Tap on your name.
- Select “Password & Security.”
- Tap “Two-Factor Authentication.”
- Follow prompts to set up 2FA.
Additional Security Measures
- Strong Password: Use a unique, complex password.
- Account Recovery: Set up recovery options (email, security questions).
- Device Security: Use Face ID, Touch ID, or passcode.
Advanced Features
- Two-Step Verification: Add extra layer of security.
- App-Specific Passwords: Generate unique passwords for third-party apps.
- Security Alerts: Receive notifications for suspicious activity.
Benefits
- Enhanced account security.
- Protection against unauthorized access.
- Peace of mind knowing data is secure.
Tips
- Regularly review account activity.
- Update recovery information.
- Use password manager.
By enabling advanced security features, you significantly improve your iCloud account’s protection.
How to Recover Your Apple ID Password

To recover your Apple ID password, follow these steps:
Step-by-Step Recovery Process
- Go to (link unavailable) on a web browser.
- Enter your Apple ID (email address).
- Choose a recovery method:
- Email: Receive a password reset email.
- Security Questions: Answer your security questions.
- Two-Factor Authentication (2FA): Use your trusted device.
- Follow the prompts to reset your password.
Additional Options
- Use the Apple Support App: Request assistance.
- Contact Apple Support: Reach out for help.
Tips
- Use a password manager to securely store passwords.
- Enable Two-Factor Authentication (2FA) for added security.
- Keep recovery information updated.
How to fix a Black Screen on a Samsung Phone

perform a Soft reset of your phone by pressing and holding the Power and Volume Down buttons together for around 10 seconds.
Put your device on charge for 15 minutes. If you haven’t used your device for more than a week, put it on charge for at least 30 minutes.
If this doesn’t help, please clear the cache partition on your device by doing the following:
1. Turn your device off, if it isn’t off already.
2. Once the device is off, hold the volume up and the power buttons at the same time for 10 seconds. Keep holding the buttons until you see a Samsung logo.
3. Using the volume down button, scroll down to Wipe cache partition.
4. Press the powerbutton to select.
Hope this helps!
How to Partition a Hard Drive in Windows 10/11

Using Disk Management:
- Press the Windows key + X and select Disk Management.
- Right-click the drive you want to partition (e.g., C:).
- Select “Shrink Volume” to create unallocated space.
- Enter the amount of space to shrink (in MB).
- Right-click the unallocated space and select “New Simple Volume.”
- Follow the wizard to create a new partition.
Using Disk part:
- Open Command Prompt as Administrator.
- Type diskpart and press Enter.
- Type list disk to see available disks.
- Select the disk you want to partition (e.g., select disk 0).
- Type list volume to see existing volumes.
- Shrink the volume (e.g., shrink desired=10000 for 10 GB).
- Create a new partition (e.g., create partition primary).
Tips:
Consider using third-party partitioning tools for more advanced features.
Back up your data before partitioning.
Be cautious when deleting partitions, as this will erase data.
Initializing Your MacBook: Important Steps to Follow

Normal Boot
- Press the Power button: Locate the Power button on your MacBook and press it.
- Wait for the boot process: Your MacBook will start booting up, and you’ll see the Apple logo or a loading screen.
- Login: Once booted, you’ll be prompted to log in with your username and password.
Safe Boot (for troubleshooting)
- Shut down your MacBook: Completely shut down your MacBook.
- Press the Power button: Press the Power button to turn it back on.
- Immediately hold the Shift key: Hold the Shift key as soon as you hear the boot chime.
- Release the Shift key: Release the Shift key when you see the login screen.
Recovery Mode
- Shut down your MacBook: Completely shut down your MacBook.
- Press the Power button: Press the Power button to turn it back on.
- Immediately hold Command (⌘) + R: Hold these keys as soon as you hear the boot chime.
- Release the keys: Release the keys when you see the Apple logo or a spinning globe.
Other Boot Options
- Verbose Mode: Boot while holding Command (⌘) + V to see detailed boot logs.
- Target Disk Mode: Boot while holding T to use your MacBook as an external hard drive.
Expert Smartphone Troubleshooting: Advanced Tools and Methodologies

Expert Smartphone Troubleshooting involves using advanced tools and methodologies to diagnose and resolve complex issues. Here’s an overview:
- Multimeter: Measures voltage, current, and resistance.
- Oscilloscope: Visualizes signal waveforms.
- Logic analyzer: Analyzes digital signals.
- USB/JTAG debuggers: Troubleshoot and repair smartphone hardware.
- Diagnostic software: Tools like ADB (Android Debug Bridge) or proprietary software.
- Signal generators: Test and analyze signal integrity.
- Power supply units: Test power consumption.
Advanced Tools
- Diagnostic Software: Utilize specialized software like ADB (Android Debug Bridge), Xcode, or proprietary tools from manufacturers.
- Hardware Testing Tools: Employ tools like multimeters, oscilloscopes, and logic analyzers to diagnose hardware issues.
- Signal Analyzers: Use signal analyzers to troubleshoot network, Wi-Fi, or Bluetooth connectivity problems.
Methodologies
- Systematic Troubleshooting: Follow a structured approach to identify and isolate issues.
- Log Analysis: Analyze system logs, crash reports, and diagnostic data to identify patterns and root causes.
- Component Isolation: Isolate specific components or modules to pinpoint the source of the issue.
- Signal Tracing: Use signal tracing techniques to diagnose issues with specific signals or data paths.
Benefits
- Faster Resolution Times: Advanced tools and methodologies enable faster identification and resolution of complex issues.
- Improved Accuracy: Systematic approaches and specialized tools reduce the likelihood of misdiagnosis.
- Enhanced Expertise: Mastering advanced tools and methodologies develops expertise in smartphone troubleshooting.
Applications
- Manufacturer Repair Centers: Advanced troubleshooting tools and methodologies are essential for manufacturer-authorized repair centers.
- Third-Party Repair Shops: Independent repair shops can benefit from advanced tools and methodologies to improve efficiency and accuracy.
- Research and Development: Advanced troubleshooting tools and methodologies can aid in the development of new smartphone technologies.
By leveraging advanced tools and methodologies, experts can efficiently diagnose and resolve complex smartphone issues, reducing downtime and improving overall device performance.