Tech Solutions
Explore practical tech solutions, smart tools, digital services, and innovative ideas designed to solve everyday and business challenges.
How to use Journal on your iPhone

Looking to start a daily journaling habit with ease? Apple’s new Journal app, introduced with iOS 17.2, helps iPhone users document memories, thoughts, and goals all in one secure and private place.
In this step-by-step guide, you’ll learn how to use the Journal app on your iPhone, explore its features, and discover how it can support mindfulness, gratitude, and personal growth.
What Is the Journal App on iPhone?
The Journal app is Apple’s official journaling tool, designed to encourage reflection through text, photos, audio recordings, and even location-based memories. It integrates with your device to suggest meaningful moments you might want to capture.
Requirements Before You Begin
- Your iPhone must be running iOS 17.2 or later
- The Journal app comes pre-installed or can be downloaded from the App Store if removed
How to Use the Journal App on iPhone (Step-by-Step)
Step 1: Open the Journal App
- Locate the Journal app on your home screen or search for “Journal” using Spotlight Search.
- Tap to open. The app will guide you with a brief intro tutorial if it’s your first time.
Step 2: Create a New Journal Entry
- Tap the “+” (plus) button at the bottom right.
- Choose from several input types:
- Text – Write freely or reflect on a prompt
- Photo – Add pictures from your gallery
- Audio – Record voice notes
- Location – Add places you’ve visited
- Activity Suggestions – Based on your day (fitness, music, trips)
Step 3: Add Details to Your Entry
You can combine multiple elements like a photo, note, and voice recording—into a single journal entry. Add:
- Titles
- Tags or emotions
- Attachments (like map location or calendar events)
This helps you organize your journal for future reflection.
Step 4: Explore Journal Suggestions
Apple’s Journal app uses on-device intelligence to offer personalized prompts based on:
- Your recent photos
- Music you’ve listened to
- Workouts completed
- Places visited
Tap “Suggested Moments” for inspiration to start writing when you’re not sure what to say.
Step 5: Review and Edit Past Entries
- Tap the Journal tab to view your entries chronologically.
- You can edit, delete, or revisit past reflections.
- Use the Search function to find journal entries by date, emotion, or keyword.
Step 6: Enable Journal Notifications (Optional)
Stay consistent by setting up gentle reminders:
Settings > Journal > Notifications > Enable Daily Reminders
You can choose what time to receive a prompt to write.
Is the Journal App Private?
Absolutely. Apple prioritizes privacy:
- All journal data is end-to-end encrypted
- Your journal is stored locally on-device
- You can use Face ID or passcode to lock the app
Why Use the Journal App on iPhone?
- ✅ Boosts mental wellness and mindfulness
- ✅ Encourages a daily habit of reflection
- ✅ Integrates with your digital lifestyle
- ✅ Totally ad-free and secure
Apple’s Journal app makes it easier than ever to build a personal journaling habit. With smart suggestions, multimedia support, and a beautiful design, it’s the perfect way to preserve your memories and improve your well-being.
Whether you’re new to journaling or looking for a digital upgrade, the Journal app on iPhone is your pocket-sized path to mindfulness and self-growth.
How to use Ambient Music in Control Center on iPhone and iPad

Looking to boost focus, reduce stress, or fall asleep faster? Apple’s built-in Background Sounds feature on iPhone and iPad lets you play relaxing ambient sounds like rain, ocean waves, and white noise directly from your Control Center.
In this step-by-step guide, we’ll show you exactly how to enable and use ambient sounds on your iPhone or iPad, with tips for personalizing the experience. No apps or subscriptions needed just your iOS device.
What Are Ambient or Background Sounds on iPhone?
Ambient sounds are natural or white noise audio tracks that play continuously in the background. Apple introduced this feature to help users:
- Improve focus and concentration
- Reduce external distractions
- Fall asleep or relax more easily
- Support users with sensory sensitivity
How to Turn On Ambient Sounds in Control Center
Follow these steps to enable and access ambient sounds from your iPhone or iPad’s Control Center:
Step 1: Update to iOS 15 or Later
Go to Settings > General > Software Update and make sure your device is running iOS 15 or later (or iPadOS 15+).
Step 2: Add the Hearing Control to Control Center
- Open the Settings app
- Tap Control Center
- Scroll down to find Hearing
- Tap the green plus (+) next to it to add it
Now the ear icon (Hearing control) will appear in Control Center.
Step 3: Access Control Center
- On Face ID devices: Swipe down from the top-right corner
- On Touch ID devices: Swipe up from the bottom
Then, tap the ear icon.
Step 4: Turn On Background Sounds
- Tap the ear icon
- Tap Background Sounds to toggle them ON
- Choose from these calming options:
- Balanced Noise
- Bright Noise
- Dark Noise
- Ocean
- Rain
- Stream
You’ll hear the sound instantly and it will play over most apps.
Step 5: Customize Background Sounds (Optional)
Want to tweak the settings? Go to:
Settings > Accessibility > Audio/Visual > Background Sounds
From here, you can:
- Change the default sound
- Adjust volume levels
- Enable sounds during media playback or when the screen is locked
Benefits of Using Ambient Sounds on iPhone & iPad
- ✔️ No need for third-party apps
- ✔️ Great for working from home or studying
- ✔️ Ideal for sleep routines and kids’ nap time
- ✔️ Privacy-friendly and battery-efficient
Final Thoughts
Ambient sounds on iPhone and iPad offer a simple, built-in solution for staying focused, calm, and relaxed. Now that you know how to access and customize them, you can start enjoying a better digital wellness experience today.
Looking for more iPhone and iPad tips? Subscribe to our blog for weekly tech tutorials!
5 helpful tips for using your iPhone and Mac together

If you’re part of the Apple ecosystem, one of the biggest advantages is how well your devices work together. Whether you’re switching from your iPhone to your Mac or using both simultaneously, Apple’s Continuity features make the experience seamless. Here are five helpful tips to help you get the most out of your iPhone and Mac together:
1. Use Handoff to Switch Devices Instantly
Handoff lets you start an activity on one device and pick it up on another. For example:
- Start writing an email on your iPhone, then finish it on your Mac.
- Begin browsing a website on Safari on your Mac, then continue on your iPhone.
How to enable:
On both devices, go to Settings (iPhone) or System Settings (Mac) > General > AirPlay & Handoff, then turn on Handoff.
2. Universal Clipboard: Copy and Paste Across Devices
Copy text, images, or files on your iPhone, and paste them directly on your Mac or vice versa. It works automatically as long as both devices are signed in to the same Apple ID and Wi-Fi network.
Example: Copy an address on your iPhone and paste it into Maps on your Mac in seconds.
3. Make and Receive Phone Calls on Your Mac
Did you know you can take iPhone calls right on your Mac?
How to enable:
Go to Settings > Phone > Calls on Other Devices on your iPhone and allow your Mac to receive calls.
On your Mac, open FaceTime > Settings > Calls from iPhone.
Now, your Mac will ring when someone calls your iPhone and you can answer it directly from your computer.
4. Use AirDrop to Instantly Share Files
AirDrop is the fastest way to transfer files between your iPhone and Mac photos, PDFs, documents, and more with just a few taps.
How to use:
- On your iPhone, select the file > tap Share > choose AirDrop > select your Mac.
- On your Mac, you’ll get a notification to accept the file.
It’s fast, wireless, and works without internet.
5. Use Your iPhone as a Webcam (Continuity Camera)
With macOS Ventura and iOS 16 or later, you can use your iPhone’s powerful rear camera as a webcam for video calls on your Mac.
How to use:
- Place your iPhone near your Mac.
- Open an app like Zoom or FaceTime.
- Your Mac will automatically detect and use your iPhone as the camera.
You’ll enjoy sharper video and features like Center Stage, Portrait Mode, and Studio Light.
Apple’s ecosystem is all about simplicity and continuity. These features can save you time, improve productivity, and make your digital life smoother. Whether you’re working, sharing content, or taking a video call, using your iPhone and Mac together unlocks powerful synergies that make multitasking effortless.
How to use Mail on your Mac
How to Use Mail on Your Mac: A Step-by-Step Beginner’s Guide
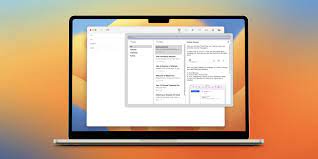
Apple’s built-in Mail app for macOS is a powerful, easy-to-use email client that integrates seamlessly with iCloud, Gmail, Outlook, Yahoo, and other services. Whether you’re setting up email for the first time or want to make the most of its features, this step-by-step guide will walk you through using Mail on your Mac.
Step 1: Open the Mail App
- Click on the Mail icon in the Dock or go to Launchpad > Mail.
- You can also open it via Applications > Mail.
Step 2: Add an Email Account
If you’re opening Mail for the first time:
- A setup window will appear.
- Choose your email provider (iCloud, Google, Yahoo, Outlook, or “Other Mail Account…”).
- Enter your email address and password.
- Follow the prompts to grant Mail access to your email.
If Mail is already set up and you want to add another account:
- Go to Mail > Add Account from the top menu bar.
- Select your provider and sign in with your credentials.
Step 3: Check Your Inbox
- Once your account is set up, Mail will begin downloading messages.
- You’ll see a sidebar with folders such as Inbox, Sent, Drafts, Trash, etc.
- Click Inbox to view your latest messages.
Step 4: Compose a New Email
- Click the New Message button (✉️) in the toolbar or use the shortcut Command (⌘) + N.
- Fill in the recipient’s email in the “To” field.
- Add a subject, write your message in the body, and click Send.
Step 5: Attach Files
- While composing a message, click the paperclip icon or drag and drop files directly into the email window to attach them.
Step 6: Organize Your Mail
- Use folders (mailboxes) to sort emails: Go to Mailbox > New Mailbox.
- Use the Search bar at the top to quickly find messages.
- Use flags, filters, and rules to manage emails more efficiently (via Mail > Settings > Rules).
Step 7: Customize Mail Settings
- Go to Mail > Settings (or Preferences).
- Under Accounts, manage your email accounts.
- Under General, adjust how Mail behaves—e.g., how often it checks for new mail, how messages are displayed, etc.
- Under Signatures, you can create a custom email signature.
Step 8: Delete or Archive Emails
- Click the Trash icon to delete.
- Or click Archive (if enabled) to save messages for later without cluttering your inbox.
Step 9: Sync with Other Apple Devices
- If you’re using iCloud, your Mail app syncs across your iPhone, iPad, and Mac automatically.
- Make sure iCloud Mail is enabled in System Settings > Apple ID > iCloud > Mail.
Bonus Tips:
- Use Smart Mailboxes to automatically group emails by rules (like from certain contacts or with attachments).
- Schedule emails using Send Later (available in newer macOS versions).
- Use Mail Drop to send large files (up to 5GB) via iCloud without clogging up inboxes.
The Mail app on Mac offers a clean, streamlined email experience with deep Apple ecosystem integration. Whether for personal or professional use, it’s packed with tools to help you stay productive and organized. With these steps, you’ll be up and running and emailing like a pro in no time.
How to Migrate Files from Windows to macOS with Apple’s Migration Assistant
Switching from a Windows PC to a Mac? Apple makes the process easier than ever with its built-in Migration Assistant tool. Whether you’re moving documents, photos, music, emails, or even system settings, this guide will help you transfer everything smoothly.
Here’s a simple, step-by-step guide to migrate your files from a Windows computer to your new Mac using Apple’s Migration Assistant.
What You’ll Need:
- Your Windows PC (with Windows 7 or later)
- Your Mac (running macOS 10.7 or later)
- Migration Assistant installed (comes pre-installed on macOS)
- Both devices on the same Wi-Fi network (or connected via Ethernet)
Step-by-Step Migration Process
Step 1: Prepare Your Windows PC
- On your Windows PC, download and install Apple’s Windows Migration Assistant that matches your macOS version.
- Close all open applications on your PC.
- Launch Migration Assistant on the Windows PC and follow the on-screen instructions.
Step 2: Launch Migration Assistant on Your Mac
- Go to Applications > Utilities > Migration Assistant on your Mac.
- When prompted, choose to transfer data “From a Windows PC.”
- Click Continue.
Step 3: Connect and Authenticate
- Your Mac will search for the Windows PC. When it finds it, select your PC from the list.
- A passcode will appear on your Mac screen. Make sure the same code is shown on the Windows PC.
- If the codes match, click Continue on both devices.
Step 4: Select Data to Transfer
- Your Mac will scan the Windows PC and display a list of data types you can transfer, such as:
- User accounts
- Documents
- Pictures
- Music
- Emails and Contacts
- System settings (where possible)
- Choose the content you want to migrate and click Continue.
Step 5: Begin the Transfer
- Depending on the size of your data, the transfer may take several minutes to a few hours.
- Do not interrupt either device during the migration.
Step 6: Finish Up
- Once the migration is complete, log into your Mac.
- Your files and settings will appear in their respective apps and folders.
Troubleshooting Tips:
- Make sure both devices are on the same network.
- Temporarily disable firewalls or antivirus software that may block connections.
- Use a wired Ethernet connection for faster and more stable transfers.
Migration Assistant makes the switch from Windows to Mac straightforward and painless. Within just a few steps, you’ll have your digital life set up on your new Mac ready to go!
If you’re planning a transition, follow this guide to ensure a smooth, secure, and complete data transfer from your PC.
How to transfer data from your old Mac to a new Mac using Migration Assistant
Upgrading to a new Mac? One of the easiest ways to move your files, apps, settings, and user accounts is by using Apple’s Migration Assistant. Whether you’re setting up a MacBook, iMac, or Mac Studio, this built-in tool makes the transition seamless.
Below is a step-by-step guide to help you transfer data from your old Mac to your new one.
What You’ll Need:
- Both old and new Macs
- Power adapters (if using laptops)
- Wi-Fi network (or a Thunderbolt/USB-C/Ethernet cable for faster transfer)
- Latest macOS updates installed on both devices
Step-by-Step Instructions:
Step 1: Connect Both Macs
- Place both Macs side by side and connect them to the same Wi-Fi network.
- For a faster, more stable transfer, use a Thunderbolt, USB-C, or Ethernet cable.
Step 2: Open Migration Assistant
On both Macs:
- Go to Applications > Utilities.
- Open Migration Assistant.
- Click Continue.
- You may be asked to enter your admin password.
Step 3: Prepare the Old Mac
On your old Mac:
- Select “To another Mac” when asked how you want to transfer data.
- Click Continue.
Step 4: Set Up the New Mac for Transfer
On your new Mac:
- Select “From a Mac, Time Machine backup, or startup disk.”
- Click Continue.
- Your new Mac will search for available sources. When your old Mac appears, select it and click Continue.
Step 5: Choose What to Transfer
- You’ll now see a list of what can be transferred: Apps, User Accounts, Documents, Settings, etc.
- Check the boxes for everything you want to move.
- Click Continue.
Tip: You can deselect large apps or files if you want a faster transfer.
Step 6: Begin the Transfer
- Migration Assistant will begin transferring the data.
- Depending on the size of the files and your connection method, this may take anywhere from 30 minutes to several hours.
- Once complete, your Mac will restart.
After the Transfer:
- Log into your account on the new Mac.
- Verify that all your files, applications, and settings are in place.
- Reauthorize any apps that need it (e.g., Adobe, Microsoft Office).
- Run Software Update to ensure everything is up to date.
Bonus Tip: Backup First!
Before starting, it’s smart to create a Time Machine backup of your old Mac—just in case anything goes wrong.
Apple’s Migration Assistant is one of the most efficient tools for a stress-free Mac upgrade. With a few simple steps, you can bring your entire digital world to your new Mac and start working or playing without missing a beat.
How to recover deleted photos on iPhone or iPad

Method 1: Recover from the Recently Deleted Album (Within 30 Days)
Open the Photos app on your iPhone or iPad.
Tap “Albums” at the bottom.
Scroll down and tap “Recently Deleted.”
Authenticate with Face ID, Touch ID, or passcode (if prompted).
Browse the photos deleted images remain here for up to 30 days.
Tap Select in the top right corner.
Tap the photos you want to recover or tap “Recover All”.
Tap Recover to confirm.
Your photos will be restored to your main Photos library.
Method 2: Recover from iCloud Photos
If you use iCloud Photos, deleted photos may still be recoverable online:
Go to iCloud.com in a web browser.
Sign in with your Apple ID.
Click on the Photos app.
Open the Recently Deleted folder (left-hand menu).
Select the images to recover and click Recover.
Method 3: Restore from an iCloud or iTunes Backup (If Not in Recently Deleted)
Use this if photos were permanently deleted and not available in the Recently Deleted folder.
For iCloud Backup:
Go to Settings > General > Transfer or Reset iPhone > Erase All Content and Settings.
Follow prompts to erase the device.
When the iPhone restarts, select “Restore from iCloud Backup”.
Sign in with your Apple ID and choose the most relevant backup.
Warning: This erases current content and replaces it with backed-up data.
For iTunes/Finder Backup:
Connect your device to your computer.
Open iTunes (on Windows/macOS Mojave and earlier) or Finder (macOS Catalina and later).
Select your device.
Click Restore Backup and choose the desired version.
Click Restore and wait for completion.
Bonus Tip: Use a Third-Party Recovery Tool
Apps like iMobie PhoneRescue, Dr.Fone, or Tenorshare UltData can sometimes retrieve photos lost due to system crashes, permanent deletions, or failed updates though they may require a computer and subscription.
Always back up your device with iCloud or iTunes to avoid losing important photos permanently. Enable iCloud Photos and regularly check Recently Deleted for recoverable content.
Are Smart Locks Secure? Here’s What You Need to Know Before Installing One

Smart locks are revolutionizing home security, offering keyless entry, remote control, and integration with smart home systems. But how safe are they compared to traditional locks?
While smart locks offer convenience, they also introduce new cybersecurity risks. Vulnerabilities such as weak passwords, outdated firmware, and insecure Wi-Fi networks can expose your lock to hacking. However, many modern smart locks use advanced encryption, biometric authentication, and two-factor verification to enhance protection.
To ensure your smart lock is secure, choose a reputable brand, regularly update the firmware, and use strong, unique credentials. It’s also wise to combine your smart lock with other smart home security measures like cameras or alarms.
In summary, smart locks can be just as secure—or more secure—than traditional locks if properly configured and maintained. Always research your options and follow best practices for digital safety to protect your home.mart locks are revolutionizing home security, offering keyless entry, remote control, and integration with smart home systems. But how safe are they compared to traditional locks?
While smart locks offer convenience, they also introduce new cybersecurity risks. Vulnerabilities such as weak passwords, outdated firmware, and insecure Wi-Fi networks can expose your lock to hacking. However, many modern smart locks use advanced encryption, biometric authentication, and two-factor verification to enhance protection.
To ensure your smart lock is secure, choose a reputable brand, regularly update the firmware, and use strong, unique credentials. It’s also wise to combine your smart lock with other smart home security measures like cameras or alarms. are smart locks truly safe?
What Are Smart Locks?
Smart locks are electronic locks that use wireless protocols like Wi-Fi, Bluetooth, or Z-Wave to communicate with smartphones, keypads, or smart home hubs. This lets users lock and unlock their doors remotely, share virtual keys, and track activity through a mobile app.
The Benefits
- Convenience: No need for physical keys. Grant or revoke access anytime.
- Remote Access: Lock or unlock your door from anywhere via your phone.
- Activity Logs: See who enters and when ideal for monitoring deliveries or guests.
- Integration: Many smart locks work with Alexa, Google Assistant, Apple HomeKit, and other smart home systems.
The Security Concerns
Despite the advantages, some risks are associated with smart lock technology:
- Hacking Risks: If your home Wi-Fi or the lock’s firmware is compromised, hackers may gain access.
- Software Vulnerabilities: Bugs or outdated software could expose flaws in security.
- Weak Passwords: Just like with any connected device, a weak password can open the door to attackers.
How to Stay Protected
To make the most of your smart lock without sacrificing security:
- Choose a trusted brand with a strong track record in cybersecurity.
- Update firmware regularly to patch security vulnerabilities.
- Use strong, unique passwords and enable two-factor authentication.
- Pair with a smart doorbell or camera for added visibility.
Smart locks can be highly secure when set up correctly and used responsibly. Like any connected device, they require thoughtful configuration and regular maintenance. For tech-savvy homeowners looking for flexibility and control, smart locks are a secure and modern solution when properly protected.
How to Secure Your Smart Security Cameras from Hackers
Smart security cameras have become essential in today’s connected homes, offering peace of mind and real-time monitoring. However, if left unprotected, these devices can be vulnerable to hackers who may gain unauthorized access to your personal space. Fortunately, you can take a few simple yet effective steps to secure your smart cameras and safeguard your privacy.

1. Change Default Username and Password
Most smart cameras come with default login credentials, which are publicly available and easy for hackers to guess. The first step after setup should be changing your username and password to something unique, complex, and not used elsewhere. Use a combination of upper/lowercase letters, numbers, and special characters.
Tip: smart camera password tips, how to create secure passwords for IoT devices
2. Regularly Update Firmware
Manufacturers release firmware updates to fix bugs and patch security vulnerabilities. Make it a habit to check your camera’s app or website for updates. Enable automatic updates if the feature is available.
Tip: firmware update for smart cameras, security updates for home surveillance
3. Secure Your Wi-Fi Network
Your camera is only as secure as your Wi-Fi network. Use WPA2 or WPA3 encryption, hide your SSID if possible, and never share your Wi-Fi password openly. Also, consider using a separate guest network for your smart home devices.
Tip: how to secure home Wi-Fi, network protection for smart devices
4. Enable Two-Factor Authentication (2FA)
Many camera brands now offer 2FA to enhance account security. This feature adds a second verification step—like a code sent to your phone before access is granted. If your camera app supports it, enable this feature immediately.
Tip: 2FA for smart cameras, secure camera login protection
5. Disable Unused Features
Features like remote access, microphone recording, or cloud storage are great—but only if you use them. Disabling unused features reduces exposure to potential vulnerabilities. If you don’t need remote access, turn it off.
Tip: how to disable remote access on smart cameras, reduce camera hacking risks
6. Choose Reputable Brands
Stick to well-known brands with a strong track record of providing security patches and support. Avoid cheap or generic products with little documentation or no update roadmap.
Tip: best secure smart cameras, trusted home security camera brands
Final Thoughts
Securing your smart security cameras doesn’t require technical expertise—just a few proactive steps. By protecting your network, updating firmware, and using strong credentials, you can enjoy the benefits of a smart home without compromising your privacy.
How to change your passcode and turn on Stolen Device Protection on iPhone | Apple Support
You can update your iPhone passcode, review security settings that may grant access to your data, and enable Stolen Device Protection all directly within the Settings app.