Tech Solutions
Explore practical tech solutions, smart tools, digital services, and innovative ideas designed to solve everyday and business challenges.
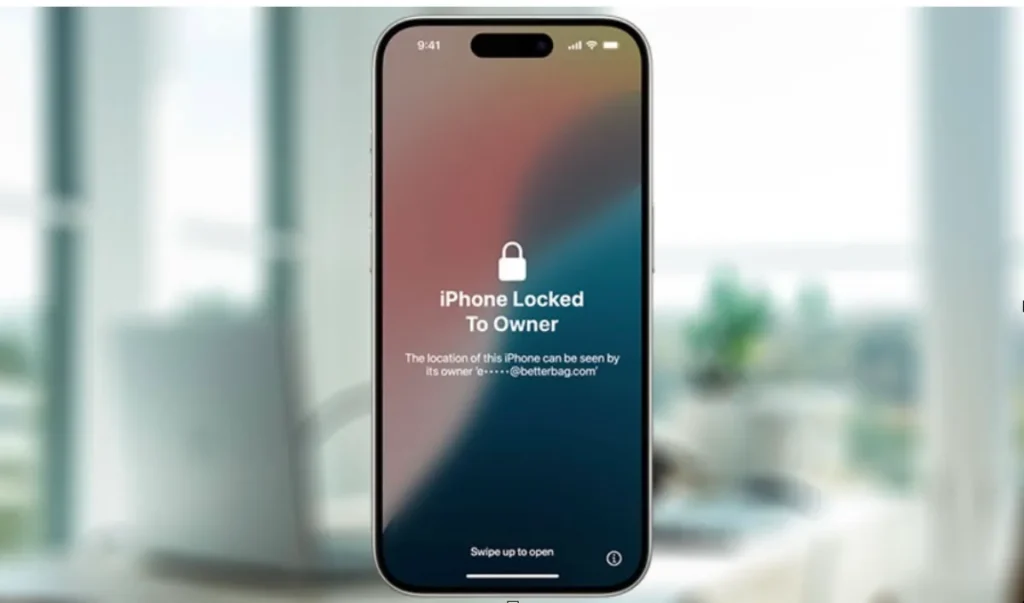
Is Your iPhone Locked? Here’s How to Find Out
To determine if your iPhone is locked to a specific network or carrier, follow these steps:
Method 1: Check via SIM Card
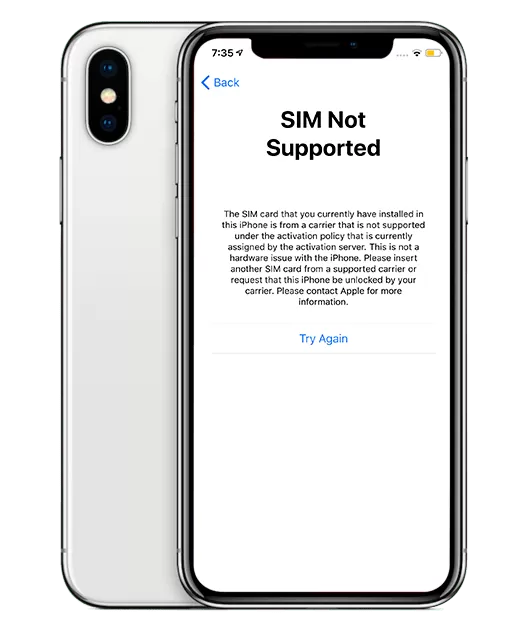
- Insert a SIM card from a different carrier: If your iPhone is locked, you’ll see a message asking you to unlock it or indicating that the SIM card is not supported.
- Look for the “No SIM restrictions” or “Unlocked” message: If your iPhone is unlocked, you won’t see any restrictions or messages.
Method 2: Check via iPhone Settings
- Go to Settings > General > About: Look for the “Carrier Lock” or “Network Provider Lock” section.
- Check for any lock information: If your iPhone is locked, you’ll see information about the carrier or network provider.
Method 3: Contact Your Carrier
- Reach out to your carrier’s customer support: They can check if your iPhone is locked to their network.
- Provide your iPhone’s IMEI number: You can find the IMEI number in Settings > General > About or by dialing *#06#.
What to Do If Your iPhone Is Locked
If your iPhone is locked, you can:
- Contact your carrier to request an unlock: They may provide an unlock code or unlock your iPhone remotely.
- Use a third-party unlocking service: Be cautious and ensure the service is reputable.
By following these steps, you can determine if your iPhone is locked to a specific network or carrier.
How to tell if an iPhone is locked to a network
To check if an iPhone is locked to a network:
Steps to Check
- Insert a different carrier’s SIM card into the iPhone.
- If the iPhone is locked, a message will appear asking to unlock it or indicating the SIM card isn’t supported.
- Alternatively, go to Settings > General > About and look for “Carrier Lock” or “Network Provider Lock” information.
Additional Options
- Contact the carrier directly to inquire about the lock status.
- Check the iPhone’s documentation or purchase agreement for lock information.
What It Means
If the iPhone is locked, it can only be used with the specific carrier it’s locked to, limiting flexibility when traveling or switching providers.
Galaxy Unpacked 2025: Samsung’s July 9 Event Promises Exciting Innovations
Samsung Galaxy Unpacked 2025: Innovations to Unfold on July 9
Samsung has officially confirmed its Galaxy Unpacked event for July 9, 2025, in Brooklyn, New York. Here’s what you need to know:
Event Details
- Date: July 9, 2025
- Time: 10:00 AM ET (7:30 PM IST)
- Location: Brooklyn, New York
- Livestream: Samsung.com, Samsung’s YouTube channel, and Samsung Newsroom
Expected Devices
- Galaxy Z Fold 7: Next-generation foldable smartphone with enhanced AI features and ultra-thin design
- Galaxy Z Flip 7: Latest iteration of the compact flip phone with improved AI capabilities
- Galaxy Watch 8 Series: New smartwatches with advanced health tracking and features
- Galaxy Buds Core: Latest wireless earbuds with improved sound quality
Key Features and Innovations
- AI-Powered Interface: Samsung’s new interface promises a more intuitive and seamless user experience
- Galaxy AI Devices: Expect advancements in artificial intelligence-driven features across Galaxy devices
- Cutting-Edge Foldable Technology: Samsung’s latest foldables are expected to showcase ultra-thin designs and enhanced AI features
Pre-Reservations and Availability
- Pre-reservations: Already live in India, offering early access and benefits worth ₹5,999 for ₹1,999 via Amazon.
How to improve the camera quality of a Motorola Razr Ultra (2025).

External display settings
- Instant Review – Show a preview on the external display after capturing with the flip open.
- Camera Cartoon – Show an animation on the external display to get your subject’s attention.
Rear camera
- Photo size – Choose from Ratio (4:3, 16:9, 21:9) or Resolution (16MP, 8MP)
- Video size – Choose from 4K UHD, 4K UHD (21:9), FHD, FHD (21:9), HD
- Slow motion size – Choose from FHD (120fps) or HD (240fps)
Tip: Lower resolution photos and videos take up less space, but have lower image quality.
Selfie camera
- Photo size – Choose from Ratio (4:3, 16:9, 21:9) or Resolution (16MP, 8MP)
- Video size – Choose from FHD, FHD (21:9), HD
- HDR – Choose from Auto, On, or Off
- Selfie photo mirror – When you look in the viewfinder, you’ll see a mirror image: left and right are reversed, and text looks backwards. You can control, however, whether the photos you take match the viewfinder or whether they’re flipped.
Capture settings
- Quick capture – Twist wrist twice to open camera or switch between front and back camera.
- Tap anywhere – Tap anywhere on the primary display to capture. Swipe up to zoom.
- Shutter sound – Camera will make a shutter sound.
- Assistive grid – Overlay a grid to help align the subjects in your photos or videos.
- Leveler – Take perfectly level photos using a guide line in the viewfinder.
- Watermark – Add a watermark or signature to your photos.
How to Create AI Videos on X with Perplexity.

To create AI videos on X with Perplexity, follow these steps:
Step-by-Step Guide
- Access Perplexity AI: Go to the Perplexity platform or app and ensure you have access to its AI video generation feature.
- Choose Video Type: Select the type of video you want to create, such as promotional, educational, or social media content.
- Input Text or Prompt: Enter the text or prompt that describes the content and tone of your video.
- Customize Video Settings: Adjust settings like video style, duration, and music to fit your preferences.
- Generate Video: Click the “Generate” button to create your AI video.
- Review and Edit: Preview your video and make any necessary edits to ensure it meets your requirements.
- Download or Share: Download your video or share it directly to X (formerly Twitter) or other social media platforms.
Tips for Effective AI Video Creation
- Clear Prompts: Provide clear and concise prompts to help the AI generate high-quality videos.
- Style Consistency: Ensure the video style aligns with your brand’s visual identity.
- Music Selection: Choose music that complements the tone and mood of your video.
Benefits of Using Perplexity for AI Video Creation
- Time-Saving: Quickly generate videos without extensive production time.
- Cost-Effective: Reduce costs associated with traditional video production.
- Customization: Easily customize videos to fit specific needs and branding.
How to transfer data from iPhone to Android phone
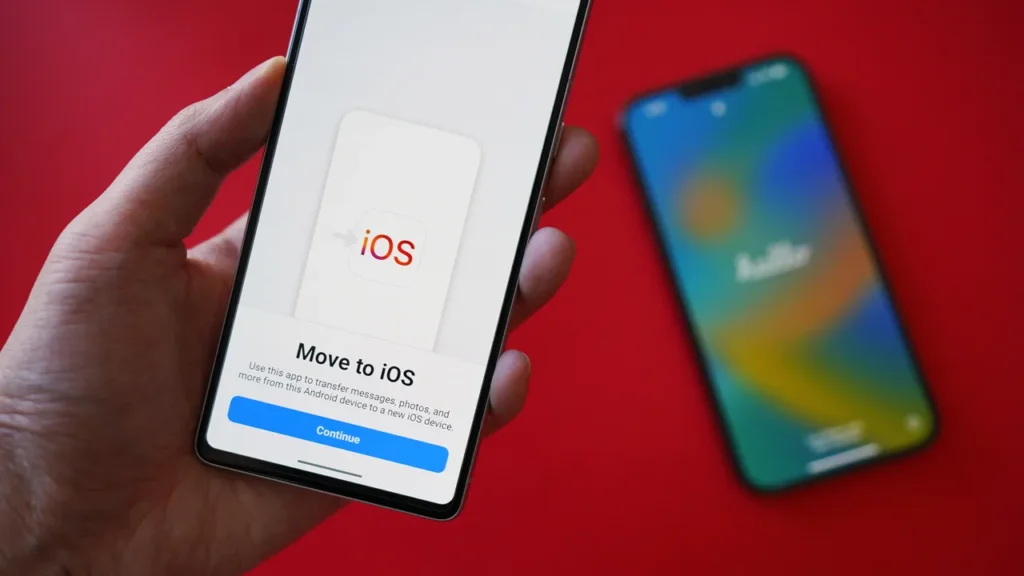
Transferring data from an iPhone to an Android phone can be done in several ways.
Methods for Transferring Data
Using MobileTrans App
- Download and Install: Download the MobileTrans app on both your iPhone and Android phone.
- Connect Devices: Launch the phone and ensure they’re connected to the same Wi-Fi network.
- Select Transfer Direction: Tap “Phone to Phone” and choose “iPhone to Android” as the transfer direction.
- Choose Data: Select the types of data you want to transfer, such as contacts, photos, videos, and music.
- Send Data: Hit “Send” and let the app transfer your data securely.¹
Using Google Drive
- Upload Data: Open Google Drive on your iPhone and upload the data you want to transfer.
- Access Data on Android: Fire up Google Drive on your Android phone and access the uploaded data.
- Download or Move Files: Download or move files/folders from Drive storage to your Android device’s internal storage.²
Using Samsung Smart Switch
- Download and Install: Download the Samsung Smart Switch app on both devices.
- Connect Devices: Connect both devices and select the transfer direction.
- Choose Data: Select the data you want to transfer and let the app do the rest.
Other Methods
- iCloud: Transfer data from iPhone to Android using iCloud by uploading data to iCloud on your iPhone and accessing it on your Android device.
- Email: Transfer small files and data using email by sending them from your iPhone and accessing them on your Android device.
- SHAREit: Transfer files between iPhone and Android devices using the SHAREit app.
- Copy My Data: Transfer files over Wi-Fi using the Copy My Data app.
How to Replace back an iMac logic board
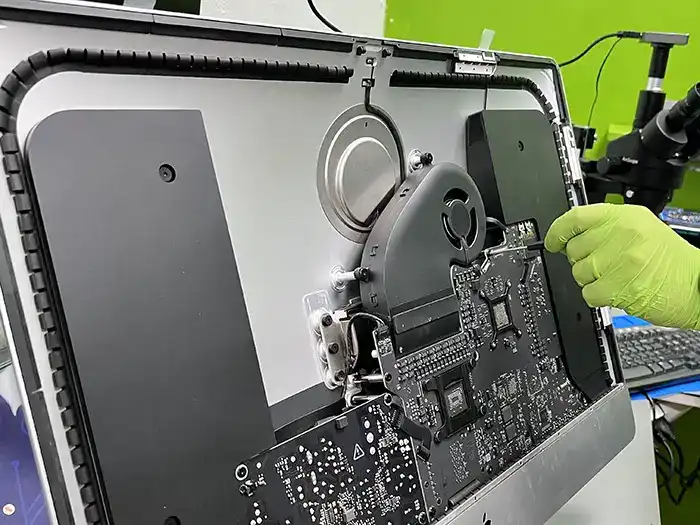
Replacing an iMac logic board is a complex procedure requiring careful disassembly, component removal, and reassembly. It generally involves disconnecting various cables and components, removing the logic board, and then installing the new one, followed by reconnecting everything. Due to the intricacy involved, it’s often recommended to seek professional help from a qualified technician.
Here’s a general outline of the process, which may vary slightly depending on the specific iMac model:
1. Preparation:
- Safety Precautions:Disconnect the iMac from power and ground yourself to prevent static discharge.
- Gather Tools:You’ll need a Phillips head screwdriver, spudger, suction cups, and potentially other specialized tools depending on your iMac model.
- Data Backup:Back up any important data before starting the replacement, as data loss can occur during the process.
2. Disassembly:
- Remove the Display:Carefully detach the display assembly, often requiring specialized suction cups to lift the glass panel, followed by disconnecting the display cable.
- Remove Components:Disconnect various cables and components connected to the logic board, including:
- Power supply.
- RAM modules.
- Hard drive/SSD.
- Optical drive.
- AirPort card.
- Speakers and other peripherals.
- Remove the Logic Board:Once all components are disconnected, locate and remove the screws holding the logic board in place. Carefully lift the logic board out of the iMac.
3. Logic Board Replacement:
- Install the New Logic Board:Place the new logic board into the iMac, ensuring it’s properly aligned and secured with screws.
- Reconnect Components:Reconnect all the components that were previously disconnected, paying close attention to cable routing and connections.
4. Reassembly:
- Reattach the Display:Carefully reattach the display assembly, ensuring all connections are secure.
- Final Checks:Before powering on, double-check all connections and ensure everything is properly installed.
5. Power On and Testing:
- Power On: Plug in the iMac and power it on.
- System Check: Verify that the iMac boots correctly and all components are functioning as expected.
Important Considerations:
- Specific Models:The exact steps and tools required can vary significantly between different iMac models. Refer to a specific repair guide for your iMac model for detailed instructions.
- ESD Protection:Static electricity can damage sensitive electronic components. Always take proper precautions to prevent static discharge.
- Component Damage:Be extremely careful when handling components, especially the logic board, as they are delicate and easily damaged.
- Professional Help:If you are not comfortable with this process, it’s highly recommended to seek help from a qualified technician to avoid potential damage to your iMac.
How to Downgrade iOS 26/19 to iOS 18 [No Data Loss] – Free in One Click
Apple has officially released iOS 26 beta, and many users have already rushed to try out the new features. But as exciting as early access sounds, the beta version often comes with bugs, app crashes, or battery drain that can disrupt your daily use. If you’re one of those users who regret downloading the iOS 26 beta, don’t worry—you’re not stuck with it. In this guide, we’ll walk you through exactly how to downgrade iOS 26 beta to iOS 18 safely and without losing your data.
Can You Downgrade from iOS 26 Beta to iOS 18?
Top 3 Ways on How to Downgrade iOS 26 Beta to 18 for iPhone/iPad
- Way 1. Downgrade iOS 26 Beta to 18 Without Data Loss/Jailbreak/iTunes [Best Recommended]HOT
- How to Remove iOS 26 Beta and Restore to the Latest Official Version [Beta Only]
- Way 2. Downgrade iOS 26 Beta to 18 via IPSW Firmware Import [Manually]
- Way 3. Downgrade iOS 26 Beta to 18 via BetaProfiles [Versions Limited]
Bouns Tips. How to Downgrade iOS 26 Beta to 18 Without Computer
Many users wonder if they can downgrade from iOS 26 Beta to iOS 18 without a computer. Unfortunately, because of how Apple manages firmware, downgrades usually require a computer and special software. There’s no official way to fully downgrade over the air once a beta is installed.
You can only remove the beta profile without a computer, but this won’t reinstall an older iOS version. It just stops future beta updates. Here’s how to remove the iOS 26 Beta profile on your iPhone or iPad without a computer:
- Step 1. Head to “Settings” on your iPhone/iPad. Then, choose “General.”
- Step 2. Tap “VPN & Device Management.” Remove the iOS 26 Beta profile. This stops future beta updates.
People Also Ask About How to Downgrade iOS 26 Beta to 18
Q1. Why is it so hard to downgrade iOS?
Downgrading iOS is difficult because Apple stops signing older versions soon after updates. Even with the right file, you can’t install it if Apple no longer approves it. Betas modify system files, so going back usually requires wiping your device. Apple does this for security, limiting downgrade options unless you use risky methods like jailbreaking.
Q2. Can I jailbreak iOS 26 Beta?
Yes, you can jailbreak iOS 26 beta, though currently only a few jailbreak tools support it, and compatibility depends on your device model and chip. Keep in mind that jailbreak options may be limited and require specific steps.
Q3. Can you downgrade iOS without iTunes?
Yes, but only sometimes. You can downgrade from iOS 26 Beta to iOS 18 if Apple is still signing it. Downgrading to stable iOS without iTunes is nearly impossible unless you use tools like Tenorshare ReiBoot, which can do it without data loss.
How to Submit Your ID for Verification

Q. How can I upload my ID after registration?
A: If you have registered for IELTS on paper, please send us your scanned or photographed ID to pginfo@britishcouncil.me.
How to Enable Advanced Security Features on iCloud

To enable advanced security features on iCloud:
Two-Factor Authentication (2FA)
- Go to Settings on your iPhone or iPad.
- Tap on your name.
- Select “Password & Security.”
- Tap “Two-Factor Authentication.”
- Follow prompts to set up 2FA.
Additional Security Measures
- Strong Password: Use a unique, complex password.
- Account Recovery: Set up recovery options (email, security questions).
- Device Security: Use Face ID, Touch ID, or passcode.
Advanced Features
- Two-Step Verification: Add extra layer of security.
- App-Specific Passwords: Generate unique passwords for third-party apps.
- Security Alerts: Receive notifications for suspicious activity.
Benefits
- Enhanced account security.
- Protection against unauthorized access.
- Peace of mind knowing data is secure.
Tips
- Regularly review account activity.
- Update recovery information.
- Use password manager.
By enabling advanced security features, you significantly improve your iCloud account’s protection.
How to Recover Your Apple ID Password

To recover your Apple ID password, follow these steps:
Step-by-Step Recovery Process
- Go to (link unavailable) on a web browser.
- Enter your Apple ID (email address).
- Choose a recovery method:
- Email: Receive a password reset email.
- Security Questions: Answer your security questions.
- Two-Factor Authentication (2FA): Use your trusted device.
- Follow the prompts to reset your password.
Additional Options
- Use the Apple Support App: Request assistance.
- Contact Apple Support: Reach out for help.
Tips
- Use a password manager to securely store passwords.
- Enable Two-Factor Authentication (2FA) for added security.
- Keep recovery information updated.