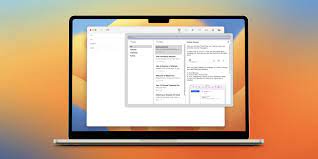
How to use Mail on your Mac
7
How to Use Mail on Your Mac: A Step-by-Step Beginner’s Guide

Apple’s built-in Mail app for macOS is a powerful, easy-to-use email client that integrates seamlessly with iCloud, Gmail, Outlook, Yahoo, and other services. Whether you’re setting up email for the first time or want to make the most of its features, this step-by-step guide will walk you through using Mail on your Mac.
Step 1: Open the Mail App
- Click on the Mail icon in the Dock or go to Launchpad > Mail.
- You can also open it via Applications > Mail.
Step 2: Add an Email Account
If you’re opening Mail for the first time:
- A setup window will appear.
- Choose your email provider (iCloud, Google, Yahoo, Outlook, or “Other Mail Account…”).
- Enter your email address and password.
- Follow the prompts to grant Mail access to your email.
If Mail is already set up and you want to add another account:
- Go to Mail > Add Account from the top menu bar.
- Select your provider and sign in with your credentials.
Step 3: Check Your Inbox
- Once your account is set up, Mail will begin downloading messages.
- You’ll see a sidebar with folders such as Inbox, Sent, Drafts, Trash, etc.
- Click Inbox to view your latest messages.
Step 4: Compose a New Email
- Click the New Message button (✉️) in the toolbar or use the shortcut Command (⌘) + N.
- Fill in the recipient’s email in the “To” field.
- Add a subject, write your message in the body, and click Send.
Step 5: Attach Files
- While composing a message, click the paperclip icon or drag and drop files directly into the email window to attach them.
Step 6: Organize Your Mail
- Use folders (mailboxes) to sort emails: Go to Mailbox > New Mailbox.
- Use the Search bar at the top to quickly find messages.
- Use flags, filters, and rules to manage emails more efficiently (via Mail > Settings > Rules).
Step 7: Customize Mail Settings
- Go to Mail > Settings (or Preferences).
- Under Accounts, manage your email accounts.
- Under General, adjust how Mail behaves—e.g., how often it checks for new mail, how messages are displayed, etc.
- Under Signatures, you can create a custom email signature.
Step 8: Delete or Archive Emails
- Click the Trash icon to delete.
- Or click Archive (if enabled) to save messages for later without cluttering your inbox.
Step 9: Sync with Other Apple Devices
- If you’re using iCloud, your Mail app syncs across your iPhone, iPad, and Mac automatically.
- Make sure iCloud Mail is enabled in System Settings > Apple ID > iCloud > Mail.
Bonus Tips:
- Use Smart Mailboxes to automatically group emails by rules (like from certain contacts or with attachments).
- Schedule emails using Send Later (available in newer macOS versions).
- Use Mail Drop to send large files (up to 5GB) via iCloud without clogging up inboxes.
The Mail app on Mac offers a clean, streamlined email experience with deep Apple ecosystem integration. Whether for personal or professional use, it’s packed with tools to help you stay productive and organized. With these steps, you’ll be up and running and emailing like a pro in no time.
Related Articles
How to Set Up Dual Monitors on Windows and Mac
Learn how to set up dual monitors on your Windows PC or...
5 helpful tips for using your iPhone and Mac together
If you’re part of the Apple ecosystem, one of the biggest advantages...


